Simsona Corporation
  • HOME
  • CUSTOM HOMES
  • STEEL DETAILING
    • SERVICES
      • STRUCTURAL STEEL DETAILING
      • MISC. STEEL DETAILING
      • 3D LASER SCANNING
      • SCAN TO BIM
    • STEEL DETAILING PROJECTS
      • COMMERCIAL
      • RESIDENTIAL/CUSTOM HOMES
    • SAMPLES DRAWINGS
  • LIGHT GAUGE DETAILING
  • STRUCTURAL DESIGN
  • REBAR DETAILING
    • SERVICES
    • PROJECTS
    • SAMPLE DRAWINGS
  • BIM SERVICES
    • ABOUT SIMSONA BIM
    • SERVICES
      • ARCHITECTURAL BIM SERVICES
      • STRUCTURAL BIM SERVICES
      • MEP BIM SERVICES
    • BIM PROJECTS
      • ARCHITECTURAL PROJECT
      • STRUCTURAL PROJECTS
      • MEP PROJECTS
    • BIM LOD
  • GLAZING SHOP DRAWINGS
    • ABOUT
    • PROJECTS
    • SAMPLES
  • TAKEOFF SERVICES
    • ABOUT TAKEOFF
    • DIVISION 2 – SITEWORK
    • DIVISION 3 – CONCRETE
    • DIVISION 4 – MASONRY
    • DIVISION 5 – STEEL
    • DIVISION 6 – LUMBER/WOOD
    • DIVISION 7 – INSULATION/ROOFING/SIDING
    • DIVISION 8 – DOORS/WINDOWS
    • DIVISION 9 – FINISHES
    • DIVISION 10 – SPECIALTIES
    • DIVISION 15 – MECHANICAL AND PLUMBING
    • DIVISION 16 – ELECTRICAL
  • CLIENTS
  • CONTACT US
  • UPLOAD FILES
  • PAYMENTS
  • PRODUCTS
  • Windows
    • Windows
    • PVC Windows
  • Smart Home Technology
  • Menu Menu
Email: RAJ@SIMSONA.COM

Phone: 301-774-0880

Bill of Materials (BOM) in Steel Detailing: A Complete Guide

October 9, 2026/in Blogs/by Praveen Kumar

bill of material in steel detailing

A Bill of Materials (BOM) is one of the most important documents produced during structural steel detailing. It provides a structured list of the materials, components, quantities, sizes, weights, and other information required to fabricate and construct a steel structure.

For steel fabricators and contractors, an accurate BOM is much more than a simple material list. It supports material procurement, estimating, fabrication planning, inventory management, shipping, cost control, and project coordination.

With modern 3D steel detailing software such as Tekla Structures, BOM information can be extracted directly from the detailed model, helping reduce manual calculations and improving consistency between the model, drawings, and fabrication information.

What Is a Bill of Materials in Steel Detailing?

A Bill of Materials (BOM) is a detailed list of the materials and components required to manufacture and assemble structural steel elements.

Depending on the project, a steel BOM can include information such as:

  • Member marks.
  • Assembly marks.
  • Part marks.
  • Steel profiles.
  • Plate dimensions.
  • Material grades.
  • Thicknesses.
  • Lengths.
  • Quantities.
  • Unit weights.
  • Total weights.
  • Bolt sizes.
  • Bolt quantities.
  • Weld information.
  • Surface treatment.
  • Coatings.
  • Miscellaneous steel components.

The exact format varies according to the fabricator, project specifications, client requirements, and fabrication system.

Why Is a BOM Important in Steel Detailing?

Structural steel projects can involve thousands of individual components.

A large commercial building may contain:

  • Hundreds of columns.
  • Thousands of beams.
  • Large quantities of connection plates.
  • Thousands of bolts.
  • Stiffeners.
  • Bracing members.
  • Miscellaneous steel.
  • Handrails and stairs.

Manually tracking all these components can be extremely difficult.

A properly prepared BOM provides a consolidated overview of the materials required for the project.

It helps project teams answer important questions such as:

What materials are required?

How much steel needs to be purchased?

How many plates are required?

How many bolts are needed?

What is the total fabricated steel weight?

Which materials have already been procured?

What materials are still required?

Key Components of a Steel BOM

A typical structural steel BOM may contain several categories of information.

1. Part Mark

The part mark identifies an individual component within the project.

For example:

  • B102.
  • C205.
  • PL305.
  • BR410.

Part marks allow fabrication teams to connect material information with shop drawings and the 3D model.

2. Assembly Mark

An assembly mark identifies a fabricated assembly.

For example, a column assembly might consist of:

  • Main column.
  • Base plate.
  • Cap plate.
  • Stiffeners.
  • Connection plates.

The assembly mark allows the fabricator to understand which individual components belong together.

3. Profile

The BOM identifies the steel section used for each structural member.

Common profiles include:

  • W-shapes.
  • HSS.
  • Channels.
  • Angles.
  • I-sections.
  • T-sections.
  • Rectangular hollow sections.
  • Circular hollow sections.

The profile information is important for procurement and fabrication.

4. Material Grade

The material grade identifies the specified strength and type of steel.

Examples may include:

  • ASTM A36.
  • ASTM A572 Grade 50.
  • ASTM A500.
  • EN 10025 grades.
  • CSA steel grades.

The applicable material grade depends on the project’s design requirements and governing standards.

5. Dimensions

For plates and fabricated components, the BOM may include:

  • Length.
  • Width.
  • Thickness.
  • Diameter.
  • Area.

For rolled sections, it may include:

  • Profile.
  • Length.
  • Weight per unit length.

6. Quantity

Quantity indicates how many identical components are required.

For example:

Part Description Quantity
B101 W18×35 beam 12
PL201 10 mm plate 24
BR301 HSS brace 8
BL401 3/4 in bolt 96

Quantity information supports purchasing, fabrication planning, and inventory management.

Steel Weight in a BOM

Steel weight is one of the most important pieces of information in structural steel projects.

The BOM may provide:

  • Individual part weight.
  • Assembly weight.
  • Total member weight.
  • Total plate weight.
  • Total project steel weight.

For rolled steel sections, weight can often be calculated using:

Weight = Length × Unit Weight

For example, if a steel section weighs 50 kg/m and the required length is 8 m:

Weight = 50 × 8 = 400 kg

In real projects, the software may calculate weights based on the actual modeled geometry.

This is particularly useful when the model contains:

  • Cuts.
  • Holes.
  • Coping.
  • Notches.
  • Plates.
  • Connection components.


Types of BOMs in Steel Detailing

There is not necessarily one single BOM for every project.

Different BOMs can serve different purposes.

1. Material BOM

A material BOM provides an overview of raw materials required for fabrication.

It can include:

  • Steel profiles.
  • Plates.
  • Pipes.
  • Angles.
  • Channels.
  • Bolts.
  • Other components.

This type of BOM is useful for procurement.

2. Fabrication BOM

A fabrication BOM focuses on components required to manufacture assemblies.

It may contain:

  • Part marks.
  • Profiles.
  • Plate sizes.
  • Thicknesses.
  • Quantities.
  • Material grades.
  • Assembly information.

Fabricators can use this information to organize shop production.

3. Assembly BOM

An assembly BOM lists the individual components belonging to an assembly.

For example:

Column Assembly C105

  • Main column.
  • Base plate.
  • Cap plate.
  • Four stiffeners.
  • Connection plates.
  • Bolts.

This helps fabrication teams understand how the assembly is constructed.

4. Erection BOM

An erection-oriented material list may organize steel according to erection requirements.

It can help site teams identify:

  • Member marks.
  • Assembly marks.
  • Quantities.
  • Weights.
  • Locations.

This can assist with transportation and erection planning.

5. Bolt List

Bolts may be reported separately.

A bolt list can include:

  • Bolt diameter.
  • Bolt length.
  • Bolt grade.
  • Bolt type.
  • Quantity.
  • Connection or assembly reference.

Separating bolts from primary steel can simplify procurement.

BOM vs. Material Takeoff

BOM and material takeoff are closely related but are not always identical.

A material takeoff generally focuses on determining the quantities of materials required for a project.

A BOM is typically a structured list of components and materials associated with fabrication or assembly.

For example:

Material Takeoff

125 tons of structural steel required.

BOM

W18×35 — 12 members — 96 m total — 4,800 kg
W24×55 — 18 members — 144 m total — 10,500 kg
PL 12×300×600 — 40 pieces
3/4 in bolts — 1,250 pieces

The BOM provides a much more granular breakdown.

How Is a BOM Created in Steel Detailing?

The BOM creation process generally begins with the structural design information.

Step 1: Review Design Drawings

The detailer reviews:

  • Structural plans.
  • Elevations.
  • Sections.
  • Connection details.
  • Design specifications.
  • Architectural information.

Step 2: Build the 3D Model

The steel detailer creates the structural steel model using detailing software.

Typical objects include:

  • Beams.
  • Columns.
  • Braces.
  • Plates.
  • Connections.
  • Bolts.
  • Welds.

Step 3: Add Fabrication Information

The model is developed to fabrication level.

This may include:

  • Cuts.
  • Holes.
  • Coping.
  • Plates.
  • Stiffeners.
  • Bolts.
  • Welds.
  • Connection components.

Step 4: Assign Material Information

Each component should have the appropriate:

  • Profile.
  • Material grade.
  • Thickness.
  • Size.
  • Length.
  • Other required properties.

Step 5: Number the Model

Parts and assemblies are assigned marks.

This allows the BOM to be connected to the corresponding drawings and model objects.

Step 6: Generate the BOM

Once the model has been checked, reports can be generated using the detailing software.

The BOM can then be exported or formatted according to project requirements.

BOM in Tekla Structures

For modern steel detailers, software such as Tekla Structures can automate much of the BOM generation process.

Because the BOM is generated from the detailed 3D model, information can be extracted for:

  • Parts.
  • Assemblies.
  • Profiles.
  • Plates.
  • Bolts.
  • Materials.
  • Quantities.
  • Lengths.
  • Weights.

The detailer can create different report templates depending on the project requirements.

This creates an important relationship:

3D Model → Numbering → Drawings → BOM → Fabrication

If the model is accurate, the resulting BOM can provide a reliable representation of the modeled materials.


Example of a Steel BOM

A simplified structural steel BOM might look like this:

Mark Description Material Qty. Length Unit Weight Total Weight
C101 W14×48 Column A992 6 9 m 71 kg/m 3,834 kg
B201 W18×35 Beam A992 12 8 m 52 kg/m 4,992 kg
BR301 HSS 6×6×3/8 Brace A500 8 6 m — —
PL401 Base Plate A36 6 — — 540 kg
PL402 Connection Plate A36 24 — — 310 kg

The actual BOM format will depend on project standards and fabrication requirements.

How BOMs Help Steel Fabricators

A reliable BOM provides significant benefits to fabrication shops.

Material Procurement

Fabricators can determine how much steel needs to be purchased.

Inventory Management

The BOM can be compared against existing stock.

Production Planning

Components can be organized according to fabrication requirements.

Cost Estimation

Steel quantities and weights can support project cost calculations.

Shipping

Assembly weights and dimensions can assist with transportation planning.

Waste Management

Material quantities can be analyzed to improve cutting and nesting strategies.

BOM and CNC Fabrication

The BOM is only one part of a modern digital fabrication workflow.

A detailed steel model can also provide information for CNC fabrication.

For example:

Tekla Model

↓

BOM

↓

Shop Drawings

↓

NC/CNC Data

↓

Fabrication

This reduces the amount of information that must be manually re-entered between different stages.

BOM Accuracy: Why Model Quality Matters

The quality of a BOM depends heavily on the quality of the underlying model.

If the model contains:

  • Incorrect member sizes.
  • Missing plates.
  • Incorrect quantities.
  • Wrong material grades.
  • Duplicate components.
  • Incorrect lengths.
  • Missing bolts.

then the BOM may also contain incorrect information.

Therefore:

A BOM is only as reliable as the data used to generate it.

This is why model checking is a critical part of steel detailing.

Common BOM Errors in Steel Detailing

Several mistakes can affect BOM accuracy.

Incorrect Member Lengths

Incorrect modeling can produce inaccurate material quantities.

Wrong Material Grades

Using the wrong grade can create procurement problems.

Duplicate Components

Duplicate modeled elements can inflate quantities.

Missing Components

Unmodeled plates, stiffeners, or connection components may be absent from the BOM.

Incorrect Numbering

Poor numbering practices can make it difficult to connect the BOM with shop drawings.

Outdated Reports

A BOM generated before the latest model revision may no longer reflect the current design.

Best Practices for Preparing a Steel BOM

1. Generate the BOM From the Final Checked Model

Avoid generating procurement information from an incomplete model.

2. Use Consistent Naming

Maintain consistent part and assembly marks.

3. Separate Material Categories

Where appropriate, separate:

  • Main steel.
  • Plates.
  • Bolts.
  • Miscellaneous steel.
  • Other purchased components.

4. Include Revision Information

The BOM should clearly identify the applicable project revision.

5. Cross-Check With Drawings

Verify that BOM quantities and marks correspond to the issued drawings.

6. Check Weight Calculations

Review total weights against expected project quantities.

7. Coordinate With the Fabricator

The BOM format should match the fabricator’s procurement and production workflow.

BOM and Steel Detailing: From Drawings to Fabrication

The modern steel detailing process can be visualized as a connected information chain:

Structural Design

↓

Steel Detailing

↓

3D BIM Model

↓

Model Checking

↓

Numbering

↓

Shop Drawings

↓

Bill of Materials

↓

CNC/Fabrication Data

↓

Fabrication

↓

Transportation

↓

Erection

A properly structured BOM helps maintain continuity throughout this process.

The Future of BOMs in Steel Detailing

The role of the BOM is evolving as the construction industry moves toward digital fabrication.

Future steel workflows are increasingly likely to integrate:

  • BIM.
  • Cloud collaboration.
  • Automated quantity extraction.
  • Digital fabrication.
  • CNC machinery.
  • Robotic welding.
  • Automated material tracking.
  • RFID/barcode systems.
  • Digital twins.
  • AI-assisted quality control.

Instead of treating the BOM as an isolated spreadsheet, companies can connect material information directly to the digital model and fabrication process.

This creates a more traceable workflow in which individual steel components can potentially be tracked from procurement through fabrication and erection.

Conclusion

A Bill of Materials (BOM) is a fundamental part of modern steel detailing. It converts information from the detailed steel model into an organized list of materials and components that can support procurement, fabrication, estimating, logistics, and construction.

For steel detailers, creating an accurate BOM requires more than generating a report. It requires a properly modeled and checked structure, correct material information, consistent numbering, and an understanding of how the fabricator will use the information.

With modern detailing platforms such as Tekla Structures, much of the BOM generation process can be automated from the 3D model.

The result is a connected workflow:

Accurate Model → Accurate Drawings → Accurate BOM → Better Fabrication

For steel fabrication projects, that connection can reduce manual work, improve material control, and help minimize costly errors and rework.

https://www.simsona.com/wp-content/uploads/2025/03/simsona-logo-2025.png 0 0 Praveen Kumar https://www.simsona.com/wp-content/uploads/2025/03/simsona-logo-2025.png Praveen Kumar2026-10-09 13:28:422026-10-09 13:40:24Bill of Materials (BOM) in Steel Detailing: A Complete Guide

Beam to Column Connection Detailing: A Practical Guide

October 9, 2026/in Blogs/by Praveen Kumar

Beam to Column Connection Detailing


Beam-to-column connection detailing is one of the most important parts of structural steel detailing because it defines how beams transfer loads into columns and how the structural frame behaves under different loading conditions. A properly detailed connection must satisfy structural requirements while also being practical to fabricate, transport, erect, inspect, and maintain.

In a steel building, the connection between a beam and column is more than simply joining two steel members with bolts or welds. The detail must account for forces, member sizes, connection geometry, bolt arrangements, weld requirements, clearances, fabrication tolerances, erection conditions, and the applicable structural standards.

For steel detailers, understanding these requirements is essential for producing accurate shop drawings and erection drawings that can be used confidently by fabricators and erection teams.


What Is a Beam-to-Column Connection?

A beam-to-column connection is the structural connection used to join a horizontal beam to a vertical column. Its primary purpose is to transfer the forces generated in the beam into the column and ultimately into the building’s foundation.

Depending on the structural system and design requirements, the connection may be designed as a simple shear connection, a moment connection, or another specialized connection.

The connection type affects how the beam and column interact. A simple shear connection generally allows rotation while transferring vertical shear forces, whereas a moment connection is designed to transfer significant bending moment along with shear and axial forces.

The structural engineer determines the required connection capacity and behaviour. The steel detailer then translates that engineered design into accurate fabrication and erection information.


Common Types of Beam-to-Column Connections

There are several common beam-to-column connection arrangements used in structural steel construction.


Shear Connections

A shear connection is primarily intended to transfer shear forces from the beam into the column while allowing the beam to rotate.

Common examples include:

  • Single plate or shear tab connections
  • Double-angle connections
  • Seated connections
  • End plate connections

A single plate connection, for example, may use a vertical plate welded to the column and bolted to the beam web. The bolts transfer the required forces between the beam and connection plate.

These connections are commonly used where the beam is not required to provide significant moment resistance at the column.


Moment Connections

Moment connections are designed to transfer bending moments as well as shear forces between the beam and column.

They typically require more extensive detailing than ordinary shear connections. Depending on the design, the beam flanges may be connected to the column using plates, welds, bolts, or combinations of these methods.

Moment connection detailing requires particular attention to:

  • Beam flange connections.
  • Beam web connections.
  • Continuity plates.
  • Doubler plates.
  • Column panel zones.
  • Weld sizes and types.
  • Bolt sizes and patterns.
  • Access for welding and bolting
  • Erection sequence.

Because these connections can experience substantial forces, coordination between structural design and detailing is particularly important.


End Plate Connections

End plate connections use a plate attached to the end of the beam. The plate is then connected to the column using bolts or another specified connection method.

Depending on the design, end plates may be used for shear or moment connections.

The detailer must accurately show the plate thickness, dimensions, bolt-hole sizes, bolt spacing, edge distances, weld requirements, and relationship between the beam and column.


Angle Connections

Angle connections use one or more structural angles to connect the beam to the column.

They may be bolted to the beam web and column flange or connected using another specified arrangement. Angle connections can be relatively simple to fabricate, but accurate bolt positioning and clearances are still essential.

Key Components in Beam-to-Column Connection Detailing

A typical beam-to-column connection may contain several components depending on its design.

Beam

The beam carries loads from the floor, roof, or other structural elements and transfers them toward the supporting columns.

The detailer must accurately represent the beam section, orientation, length, coping, holes, stiffeners, plates, and connection components.


Column

The column receives loads from connected beams and transfers them toward the foundation.

Column detailing becomes particularly important when several beams connect at the same elevation. The detailer must coordinate all connection components to prevent physical interference.


Connection Plate

Plates are frequently used to connect beams and columns. Their dimensions, thickness, location, bolt holes, welds, and orientation must correspond with the engineered connection.


Bolts

Bolted connections require accurate representation of bolt diameter, grade, quantity, spacing, hole type, and installation requirements.

Bolt access should also be considered. A theoretically correct bolt pattern may become difficult to install if there is insufficient wrench clearance or access around the connection.


Welds

Welded components must be detailed with the appropriate weld symbols, weld sizes, lengths, and locations.

The detailer should not arbitrarily change a specified weld. Weld information should be based on the approved engineering design and applicable project requirements.


Stiffeners and Continuity Plates

Some beam-to-column connections require stiffeners or continuity plates to improve the capacity of the column or transfer forces through the connection.

These components require careful detailing because they are often located inside or around the column flange and web.

Their geometry must be coordinated with the connected beam flanges, column dimensions, welds, and other internal components.

Important Considerations for Beam-to-Column Detailing

Accurate beam-to-column connection detailing involves more than reproducing an engineering sketch. Several practical considerations need to be addressed.

Connection Geometry

The geometry of the connection must be consistent with the actual beam and column dimensions.

For example, the detailer should verify:

  • Beam depth.
  • Column flange width.
  • Column depth.
  • Plate dimensions.
  • Connection offsets.
  • Bolt locations.
  • Weld locations.
  • Beam elevations.
  • Required clearances.

Small dimensional errors can create significant problems during fabrication or erection.


Bolt Spacing and Edge Distances

Bolt holes must be positioned according to the design and applicable detailing requirements.

The detail should account for required bolt spacing and edge distances while also considering access for installation.

Bolt patterns should be coordinated with existing holes, stiffeners, plates, and adjacent connections.


Weld Access

Welded connections require sufficient access for fabrication.

A connection can satisfy the theoretical design requirements but still create fabrication difficulties if the welder cannot properly access the required weld location.

Therefore, connection detailing should consider weld access, welding sequence, member geometry, and shop fabrication requirements.


Erection Clearance

Steel members are fabricated separately and assembled at the construction site. The connection therefore needs to accommodate practical erection conditions.

The detailer should consider:

  • Bolt installation access.
  • Member fit-up.
  • Temporary erection conditions.
  • Field welding access.
  • Construction tolerances.
  • Interference with adjacent members.

Proper erection clearance can significantly reduce field modifications.

Beam Coping and Connection Detailing

Beam coping is often required when a beam connects to a column or another structural member and its flange interferes with the supporting member.

A cope removes a portion of the beam flange and sometimes part of the web to provide clearance.

Copes must be carefully detailed because removing material from the beam changes its geometry and may affect its structural capacity.

The connection design should therefore specify any required cope dimensions, and the detailer should accurately represent them on the shop drawings.

Incorrect cope dimensions can cause fabrication problems or prevent the beam from fitting properly during erection.

Column Panel Zone Considerations

In moment-resisting frames, the region of the column web between the beam flanges is commonly referred to as the panel zone.

This region can experience significant shear forces.

Depending on the structural design, additional reinforcement such as doubler plates may be required.

The detailer needs to coordinate these plates with the beam flanges, column web, continuity plates, welds, and surrounding connections.

Panel zone detailing is particularly important because several forces may converge at the same location.

Continuity Plate Detailing

Continuity plates may be installed inside a column to transfer forces from beam flanges into the column.

Their dimensions and thickness are determined by structural requirements.

When detailing continuity plates, the detailer needs to consider their location relative to:

  • Beam flanges.
  • Column flanges.
  • Column web.
  • Doubler plates.
  • Welds.
  • Access holes.
  • Adjacent connections.

The final shop drawing should clearly communicate how these components are fabricated and assembled.

Beam to Column Connection Shop Drawings

A good shop drawing should provide enough information for fabrication without requiring the fabricator to interpret the engineering intent.

Depending on the project, a beam-to-column connection drawing may include:

  • Member identification.
  • Beam and column sizes.
  • Connection plate dimensions.
  • Plate thicknesses.
  • Bolt diameter and grade.
  • Number of bolts.
  • Bolt-hole dimensions.
  • Weld symbols.
  • Weld sizes.
  • Connection elevations.
  • Overall dimensions.
  • Edge distances.
  • Material specifications.
  • Cope dimensions.
  • Stiffener locations.
  • Continuity plate information.
  • Detail references.
  • Section views.
  • Connection marks.

The drawing should be clear, consistent, and coordinated with the overall structural model.


3D Modeling for Beam to Column Connections

Modern structural steel detailing increasingly relies on 3D BIM and structural detailing software.

Platforms such as Tekla Structures and other structural modeling applications allow detailers to model beams, columns, plates, bolts, welds, stiffeners, and other connection components in a coordinated environment.

A 3D model makes it easier to identify physical conflicts before fabrication.

For example, a model-based review may identify:

  • Bolt clashes.
  • Plate interference.
  • Beam flange conflicts.
  • Stiffener conflicts.
  • Insufficient access.
  • Incorrect elevations.
  • Member alignment problems.
  • Interference with MEP or architectural elements.

This type of coordination can reduce the number of problems discovered during fabrication or construction.


Connection Detailing and Clash Detection

Clash detection is particularly valuable when several structural members meet in a small area.

A column may have multiple beams connecting at different elevations, while braces, stairs, framing members, and MEP components may also occupy the same space.

A coordinated BIM model allows these conditions to be reviewed before steel fabrication begins.

The objective is not simply to identify geometric clashes. The review should also determine whether the connection can realistically be fabricated, assembled, bolted, welded, and erected.


Coordination Between Engineer and Detailer

The structural engineer and steel detailer have different responsibilities but must work closely together.

The engineer establishes the structural requirements and connection design. The detailer converts those requirements into fabrication and erection information.

When a connection design appears impractical or contains conflicting information, the detailer should raise an RFI rather than make an unsupported design change.

An RFI may be required when there is:

  • Missing connection information.
  • Conflicting dimensions.
  • Unclear weld requirements.
  • Bolt pattern conflicts.
  • Insufficient clearance.
  • Structural member interference.
  • Unclear connection orientation.
  • Conflicting architectural or structural information.

Clear communication at this stage can prevent costly field changes.


Common Beam to Column Detailing Errors

Several mistakes can create problems during fabrication and erection.

One common issue is incorrect connection orientation. A plate or connection detail may be modeled on the wrong side of the beam or column.

Another problem is incorrect bolt spacing or edge distance. Even small dimensional errors can affect fabrication and installation.

Insufficient access is another important concern. Bolts and welds may technically fit within the model but may not be practically accessible during construction.

Other common issues include incorrect beam elevations, missing stiffeners, incorrect cope dimensions, uncoordinated welds, conflicting connection plates, and failure to account for adjacent structural members.

These issues highlight why connection detailing should involve both design review and constructability review.


Standards and Project Requirements

Beam to column connections must be detailed according to the structural design documents and applicable project standards.

Depending on the location and project requirements, structural steel detailing may involve standards and specifications from organizations such as AISC, AWS, ASTM, and OSHA, along with project-specific requirements.

The detailer should always use the latest approved structural drawings, specifications, connection design information, and project detailing standards.

The specific requirements can vary depending on the structural system, jurisdiction, material, connection type, and project specifications.


Role of Steel Detailing in Construction

Steel detailing provides the link between structural engineering and physical steel fabrication.

An engineer may specify the required connection capacity, while the detailer develops the detailed geometry needed to fabricate and erect that connection.

Accurate detailing helps fabricators understand exactly how plates, bolts, welds, stiffeners, and structural members should be produced and assembled.

For contractors and erectors, clear erection drawings provide the information needed to locate and connect structural members on site.

Therefore, connection detailing has a direct impact on fabrication accuracy, erection efficiency, project coordination, and overall construction quality.


Conclusion

Beam to column connection detailing is a critical component of structural steel detailing. The connection must satisfy structural requirements while also being practical for fabrication and erection.

From shear tabs and end plates to complex moment connections with continuity plates and doubler plates, every component needs to be accurately modeled and documented.

Modern 3D BIM and steel detailing platforms make it possible to coordinate these connections, identify clashes, review constructability, and produce detailed shop and erection drawings before fabrication begins.

For structural steel projects, the quality of beam to column detailing can have a significant effect on how efficiently the steel is fabricated and assembled on site. Accurate modeling, careful coordination, proper interpretation of engineering documents, and timely RFIs are therefore essential parts of a reliable steel detailing workflow.

https://www.simsona.com/wp-content/uploads/2025/03/simsona-logo-2025.png 0 0 Praveen Kumar https://www.simsona.com/wp-content/uploads/2025/03/simsona-logo-2025.png Praveen Kumar2026-10-09 13:11:142026-10-09 13:11:14Beam to Column Connection Detailing: A Practical Guide

Steel Detailing Checklist: A Complete Guide

September 25, 2026/in Blogs/by admin

Steel detailing checklist


Steel detailing is one of the most important stages between structural design and steel fabrication. A detailed and accurate steel model or shop drawing provides fabricators and erectors with the information required to manufacture, assemble, and install structural steel correctly.

Even a small detailing error can result in fabrication delays, material waste, field modifications, additional costs, or schedule disruptions. For this reason, a systematic steel detailing checklist should be used before drawings and fabrication information are released.

A steel detailing checklist provides a structured way to review structural members, connections, dimensions, bolts, welds, materials, drawings, bills of materials, and other project information. It also helps ensure that the final detailing package corresponds with the structural design documents and applicable project standards.

What Is a Steel Detailing Checklist?

A steel detailing checklist is a series of quality control checks performed during and after the steel detailing process. The purpose is to identify errors and missing information before shop drawings, fabrication drawings, and erection drawings are issued for fabrication or construction.

The checklist can be used for different types of structural steel projects, including commercial buildings, industrial facilities, warehouses, manufacturing plants, bridges, and other steel structures.

Depending on the project requirements, a checklist may cover:

Structural members.

Connections.

Dimensions and elevations.

Bolts and welds.

Base plates and anchor bolts.

Material specifications.

Shop drawings.

Erection drawings.

Bills of materials.

3D steel models.

Coordination with architectural and MEP models.

Revision control.

Quality assurance and quality control.

Applicable codes and project standards.

The exact checklist should be adapted to the contract documents, structural drawings, specifications, fabricator requirements, and jurisdiction applicable to the project.

Why Is a Steel Detailing Checklist Important?

The primary purpose of a checklist is to catch problems before they reach the fabrication shop or construction site.

A steel detailing error discovered during modeling may be relatively easy to correct. The same error discovered after fabrication can require a replacement part, field modification, additional welding, or rework.

A systematic review also improves coordination between the structural engineer, detailer, fabricator, general contractor, and erector.

A well prepared checklist can help verify that:

The steel model follows the structural design.

Member sizes and locations are correct.

Connections contain the required information.

Dimensions are consistent.

Bolts and welds are properly represented.

Fabrication drawings contain sufficient information.

Erection drawings provide clear installation information.

Bills of materials correspond with the model and drawings.

Revisions have been incorporated correctly.

Clashes and coordination issues have been identified.

Required project standards have been followed.

1. Review the Structural Design Documents

Before beginning a detailed review of the steel model or shop drawings, confirm that the latest structural design documents are being used.

Check the structural plans, sections, elevations, schedules, specifications, design drawings, connection requirements, and revision information.

Verify the project name, drawing numbers, revision numbers, issue dates, and applicable structural documents.

A common source of detailing problems is working from an outdated structural drawing. Therefore, document control should be the first step in the checklist.

The reviewer should confirm:

Latest structural drawings are available.

Latest revisions have been incorporated.

Structural member schedules are current.

Design specifications are available.

Connection design requirements are understood.

Architectural backgrounds are coordinated.

Relevant RFIs and design changes have been reviewed.

2. Check Steel Member Sizes and Locations

Every primary and secondary structural member should be checked against the structural design.

This includes beams, columns, braces, joists, trusses, girts, purlins, lintels, stairs, and other steel components included in the project.

Verify the member size, material grade, orientation, location, length, elevation, and connection conditions.

For example, a beam may have the correct size but still be incorrectly detailed if its elevation or orientation does not match the structural drawings.

Check:

Beam sizes.

Column sizes.

Brace sizes.

Member lengths.

Member orientation.

Member elevations.

Grid locations.

Offsets.

Slopes.

Splices.

Member numbering and marks.

3. Check Grid Lines and Building Dimensions

Grid lines provide the basic reference system for locating structural elements.

Check that the grids shown in the steel detailing model and drawings correspond with the approved structural and architectural documents.

Important checks include grid spacing, grid names, column locations, building dimensions, offsets, and reference dimensions.

Column centerlines should align correctly with the grid system unless an intentional offset is specified in the design.

Dimensions should also be consistent between plans, elevations, sections, and detail drawings.

4. Check Columns

Columns are major load carrying components, so their geometry and connections require careful review.

Verify column size, length, orientation, elevation, base condition, splice locations, and connections to beams and braces.

Check whether column splices are located as specified and whether sufficient information is provided for fabrication and erection.

Review:

Column section and material.

Column orientation.

Column base elevation.

Column top elevation.

Column splice details.

Beam to column connections.

Brace connections.

Base plates.

Anchor bolts.

Stiffeners.

Continuity plates.

Connection plates.

5. Check Beams and Secondary Members

Beams should be reviewed for correct size, length, location, slope, camber requirements, and connection information.

Secondary steel such as purlins, girts, bridging, kickers, and miscellaneous framing should also be included where required by the structural documents.

Pay particular attention to framing intersections. A beam may appear correct individually but create a coordination problem when connected to another member.

Check:

Beam size and grade.

Beam orientation.

Beam elevations.

Beam length.

Beam slope.

End connections.

Splices.

Stiffeners.

Copes.

Notches.

Holes.

Supporting conditions.

Secondary framing.

6. Review Steel Connections

Connections are among the most important elements in steel detailing.

Each connection should provide enough information for fabrication and erection while remaining consistent with the structural design or approved connection design.

Depending on the project, connections may include bolted, welded, moment, shear, brace, splice, base plate, and miscellaneous connections.

Check:

Connection type.

Connection geometry.

Connection plates.

Bolt diameter.

Bolt quantity.

Bolt spacing.

Bolt edge distances.

Bolt hole information.

Weld size.

Weld type.

Weld length.

Stiffeners.

Gusset plates.

Connection angles.

End plates.

Splice plates.

Connection orientation.

Connection clearances.

Where connection design is delegated to the fabricator or specialty engineer, the detailing review should also verify that the approved connection information has been incorporated correctly.

7. Check Bolts and Bolt Holes

Bolting information should be reviewed carefully because incorrect bolt quantities, sizes, locations, or hole types can create fabrication and erection problems.

Verify bolt diameter, grade, quantity, spacing, edge distance, and hole size.

Also check whether field and shop bolts are clearly identified according to the project requirements.

The checklist should cover:

Bolt size.

Bolt grade.

Bolt quantity.

Bolt spacing.

Gauge.

Edge distance.

Hole diameter.

Hole type.

Bolt orientation.

Field versus shop installation.

Bolt access.

Connection clearance.

8. Review Weld Information

Weld information should be clear and consistent with the applicable design and project requirements.

Check weld symbols, weld sizes, weld lengths, weld locations, and shop versus field weld requirements.

Particular attention should be given to welds that may be difficult to access after erection.

Verify:

Weld symbol.

Weld size.

Weld length.

Weld location.

Continuous or intermittent weld requirements.

Shop welds.

Field welds.

Weld accessibility.

Weld sequencing where relevant.

9. Check Base Plates and Anchor Bolts

Column base connections should be reviewed carefully because errors can affect the interface between steel and concrete.

Verify base plate dimensions, thickness, anchor bolt locations, bolt diameter, holes, stiffeners, welds, elevations, and grout requirements where applicable.

Coordinate anchor bolt locations with the concrete foundation drawings.

Check that:

Column location is correct.

Base plate dimensions are correct.

Anchor bolt layout is correct.

Anchor bolt diameter and grade are correct.

Bolt projection is shown where required.

Base plate holes are correctly located.

Stiffeners are included.

Required leveling or grout information is provided.

10. Review Shop Drawings

Shop drawings convert the steel model and design information into fabrication information.

Each drawing should contain sufficient dimensions, marks, materials, connection details, weld information, bolt information, and references for the fabricator.

Check:

Drawing title.

Drawing number.

Revision number.

Member mark.

Material specification.

Dimensions.

Weld information.

Bolt information.

Connection references.

Sections and details.

Piece marks.

Fabrication information.

General notes.

Drawing references.

The drawing should be clear enough for a fabricator to understand what needs to be manufactured without relying on assumptions.

11. Review Erection Drawings

Erection drawings are used at the construction site to identify where individual steel members belong.

They should provide clear information about member locations, orientations, elevations, grid references, piece marks, and erection sequences where required.

Check:

Grid references.

Column locations.

Beam locations.

Brace locations.

Member marks.

Elevations.

Orientation.

Erection views.

Connection references.

Piece marks.

Field connection information.

Temporary or permanent bracing information where required.

The erection drawings should correspond with the final fabrication drawings and approved steel model.

12. Check Piece Marks and Member Identification

Each fabricated steel component should have a clear identification system.

Piece marks allow the fabricator and erector to track individual components from the shop drawing to fabrication and finally to the construction site.

Check that piece marks are:

Unique where required.

Consistent.

Readable.

Correctly referenced.

Consistent between drawings and model.

Consistent with the bill of materials.

An incorrect piece mark can result in the wrong member being fabricated or installed.

13. Check Material Specifications

Material information should correspond with the structural design and project specifications.

Review steel grades, plate grades, bolt grades, welding materials, coatings, and other specified materials.

For each relevant component, confirm:

Material grade.

Section specification.

Plate specification.

Bolt grade.

Welding requirements.

Coating or paint requirements.

Galvanizing requirements where applicable.

Special material requirements.

Material substitutions should not be assumed during detailing unless they have been properly approved.

14. Review the Bill of Materials

The Bill of Materials, or BOM, provides information about the materials required for fabrication.

The BOM should be checked against the final steel model and drawings.

Verify quantities, member marks, section sizes, lengths, plate dimensions, material grades, and other required information.

Important checks include:

Member quantity.

Piece mark.

Section size.

Material grade.

Length.

Plate dimensions.

Weight.

Assembly information.

Miscellaneous steel.

The BOM should reflect the approved detailing model rather than an earlier design version.

15. Check Model and Drawing Coordination

For BIM based steel detailing projects, the 3D model is an important source of fabrication and coordination information.

The model should be reviewed for geometry, member relationships, connections, penetrations, clashes, and constructability.

Coordination should be performed with architectural, structural, MEP, and other relevant models.

Check for:

Beam and duct clashes.

Column and architectural element conflicts.

Brace and MEP conflicts.

Clearance problems.

Access problems.

Connection conflicts.

Opening conflicts.

Equipment interface issues.

Headroom problems.

The use of BIM coordination and clash detection can identify many issues before fabrication or erection.

16. Check Constructability

A steel model can be geometrically correct but still create practical fabrication or erection difficulties.

Constructability review considers how components will actually be fabricated, transported, assembled, and installed.

Consider:

Can the connection be fabricated?

Can bolts be installed?

Is there adequate wrench access?

Can welds be performed?

Can members be transported?

Can members be erected safely?

Are temporary erection requirements addressed where applicable?

Are there conflicts with adjacent construction?

Constructability review is particularly valuable for complex structures and congested connection areas.

17. Review Openings, Penetrations, and MEP Coordination

Steel framing frequently interacts with mechanical, electrical, and plumbing systems.

Openings and penetrations should be coordinated before fabrication.

Check whether ducts, pipes, cable trays, equipment, and other services require openings or clearance around structural members.

Any structural modification required to accommodate building services should follow the approved design process.

This is one of the areas where BIM coordination can significantly reduce field conflicts.

18. Check Tolerances and Clearances

Fabrication and erection require appropriate tolerances and clearances.

Review whether the detailing reflects the tolerances specified by the project documents and applicable standards.

Pay attention to:

Bolt hole clearances.

Connection clearances.

Erection clearances.

Member fit up.

Base plate clearances.

Architectural interfaces.

MEP clearances.

Equipment clearances.

Unrealistic or missing clearances can create problems during erection even when the overall model appears correct.

19. Verify Revisions and RFIs

Steel detailing projects frequently change during design development and construction.

Revisions may result from structural changes, architectural changes, MEP coordination, RFIs, connection design changes, or field conditions.

Before issuing drawings, verify that all approved changes have been incorporated.

Maintain a clear record of:

Drawing revisions.

RFI responses.

Design changes.

Approved connection changes.

Architectural changes.

MEP coordination changes.

Field changes.

Superseded drawings.

Revision clouds and notes should be used where required by the project document control system.

20. Final Quality Control Review

After individual components have been reviewed, perform a final overall quality control check.

The reviewer should look at the project as a complete system rather than only checking individual members.

Ask:

Does the model match the structural design?

Do the drawings match the model?

Do the piece marks match the BOM?

Are all major connections represented?

Are bolts and welds clearly identified?

Are dimensions complete?

Are elevations correct?

Are revisions incorporated?

Are architectural and MEP interfaces coordinated?

Are erection drawings consistent with fabrication drawings?

Are there unresolved clashes?

Are required approvals and notes included?

Only after the required checks have been completed should the drawing package be released according to the project’s approval process.

Steel Detailing Checklist at a Glance

A practical checklist can be organized into the following categories:

Checklist Area Key Items to Verify
Design documents Latest drawings, specifications, revisions
Grid system Grid lines, dimensions, offsets
Columns Size, location, elevation, splices
Beams Size, length, elevation, connections
Bracing Size, location, gusset plates, connections
Connections Geometry, bolts, welds, plates
Bolts Size, grade, quantity, spacing, holes
Welds Size, type, length, location
Base plates Dimensions, anchor bolts, stiffeners
Shop drawings Dimensions, marks, materials, details
Erection drawings Grid references, member marks, elevations
Materials Steel, plates, bolts, welding materials
BOM Quantity, marks, sizes, lengths, weights
BIM coordination Clashes, clearances, interfaces
Constructability Fabrication and erection requirements
Revisions RFIs, approved changes, drawing revisions
Final QC Overall model, drawing, and document consistency

Common Steel Detailing Errors to Look For

A checklist becomes particularly useful when reviewers understand the problems they are trying to identify.

Common steel detailing issues include incorrect member sizes, missing connections, incorrect elevations, inaccurate dimensions, wrong bolt information, missing welds, inconsistent piece marks, outdated revisions, incorrect material specifications, incomplete erection drawings, and coordination conflicts.

Another common problem is inconsistency between different deliverables. For example, the 3D model may contain one member length while the shop drawing shows another. Similarly, a piece mark may be correct on a shop drawing but incorrect in the BOM.

This is why the review should consider the model, drawings, schedules, and material information together.


Steel Detailing Quality Control: Who Should Perform the Review?

Depending on project size and contractual requirements, quality control may involve several parties.

A steel detailer checks the model and drawings during production. A dedicated checker or senior detailer may then perform an independent review. Structural engineers or connection engineers may review design related information where required. Fabricators and erectors may also identify practical issues related to manufacturing and installation.

A well structured QA/QC process therefore creates multiple opportunities to identify errors before they become costly field problems.

Final Thoughts

A steel detailing checklist is more than a list of items to tick before issuing drawings. It is a systematic quality control process that connects structural design, steel fabrication, and field erection.

The most important principle is consistency. The structural drawings, 3D steel model, shop drawings, erection drawings, connections, piece marks, and Bill of Materials should all communicate the same approved information.

For complex steel projects, combining experienced steel detailers with BIM modeling, clash detection, constructability review, and structured QA/QC can provide an effective approach to reducing detailing errors and fabrication rework.

At Simsona, steel detailing and BIM workflows can be integrated with structural design information and project coordination requirements to support accurate fabrication and erection documentation. A structured review process helps ensure that steel detailing deliverables are ready for the next stage of construction.

https://www.simsona.com/wp-content/uploads/2025/03/simsona-logo-2025.png 0 0 admin https://www.simsona.com/wp-content/uploads/2025/03/simsona-logo-2025.png admin2026-09-25 12:52:262026-09-25 12:53:22Steel Detailing Checklist: A Complete Guide

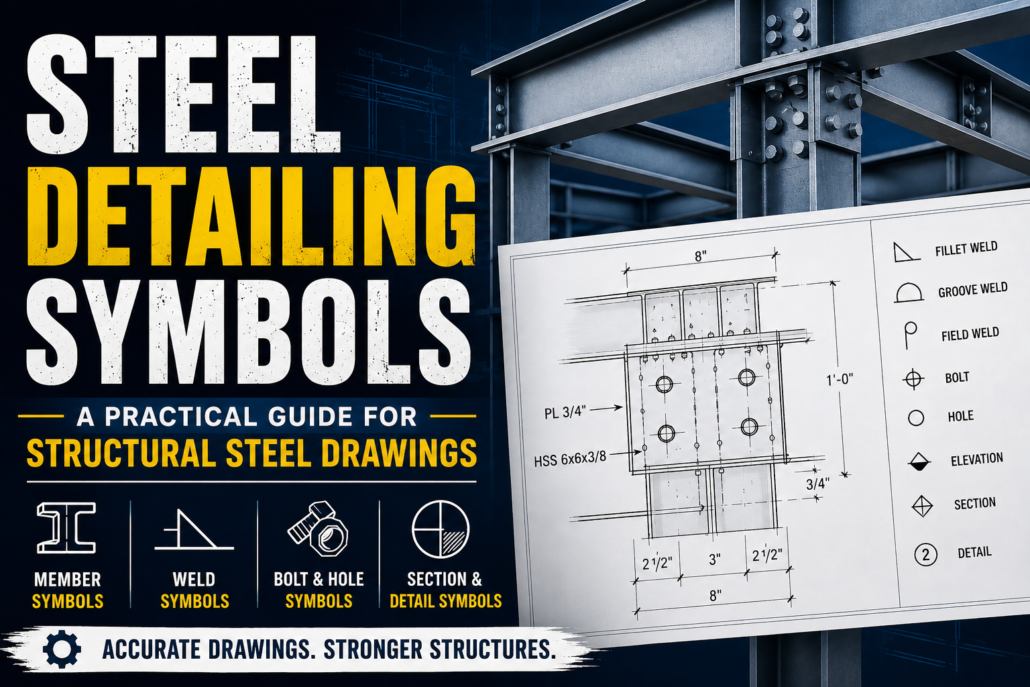
Steel Detailing Symbols: A Practical Guide || Simsona

September 18, 2026/in Blogs/by Praveen Kumar
steel detailing symbols


Introduction

Steel detailing is often described as the process of turning structural design information into fabrication and erection documents. In practice, however, much of that information is communicated through a specialized visual language: steel detailing symbols.

For structural steel fabricators, detailers, erectors, engineers, and contractors in the United States, understanding these symbols is essential. A single line, mark, abbreviation, weld symbol, dimension, or connection notation can communicate information that directly affects how a steel member is fabricated and installed.

A well-prepared steel detailing drawing therefore does more than show the shape of a beam or column. It creates a precise communication system between the engineer, steel detailer, fabricator, and erection crew.

This guide explains the most common steel detailing symbols, how they are used, and why accurate interpretation matters in U.S. structural steel projects.


What Are Steel Detailing Symbols?

Steel detailing symbols are standardized graphic representations, abbreviations, and notations used on structural steel drawings to communicate fabrication and erection requirements.

They can identify:

  • Structural members.
  • Welds.
  • Bolted connections.
  • Steel plates and angles.
  • Holes and openings.
  • Member orientations.
  • Dimensions and elevations.
  • Connection details.
  • Section and detail references.
  • Surface preparation or finishing requirements.

Instead of writing a complete description beside every component, detailers use established symbols and conventions to communicate information efficiently.

For example, a weld symbol can tell a fabricator the type of weld required, while a member mark such as B12 can identify a specific beam throughout the fabrication and erection documents.

Why Steel Detailing Symbols Matter

Accuracy in structural steel detailing is closely connected to the clarity of the drawings.

Steel fabrication involves many individual components, often manufactured at different locations and assembled at the jobsite. If a symbol is misunderstood, the result can be a fabrication error, incorrect connection, field modification, material waste, or installation delay.

Symbols help create consistency throughout the project.

A structural steel detailer may work with dozens or even hundreds of drawings, including:

  • General arrangement drawings.
  • Anchor bolt plans.
  • Erection drawings.
  • Shop drawings.
  • Part drawings.
  • Assembly drawings.
  • Connection details.

Using a consistent symbol system allows everyone involved in the project to interpret the information in the same way.

Common Steel Member Symbols

One of the first things a detailer must understand is how structural members are represented on drawings.

Beams

Beams are commonly shown using lines representing the member’s centerline or reference geometry. Beam marks may be assigned to identify individual members.

For example:

B1, B2, B3.

These marks correspond to specific beams listed in the drawing set or bill of materials.

A beam callout may also include information such as:

W18x35.

This identifies a wide-flange structural steel section with a nominal depth and weight designation according to the applicable steel-shape system.

Columns

Columns are typically identified with a column mark such as:

C1, C2, C5.

Their locations may be referenced using grid lines, elevations, and floor levels.

Column drawings can also show splice locations, base plates, stiffeners, connection plates, and other components.

Bracing

Bracing members can include:

HSS sections. Angles. Channels. Wide-flange members. Round structural sections.

Braces may be identified using marks such as BR1 or another project-specific designation.

The drawing should clearly communicate the brace’s location, orientation, member size, and connection requirements.

Plate and Connection Symbols

Structural steel connections often contain several components that must be clearly identified.

Plate Symbols

Plates can be represented by rectangular or other geometric shapes depending on their orientation.

A plate callout may include:

PL 3/4″ x 8″ x 12″.

This indicates a plate thickness and approximate width and length.

Project drawings may also use abbreviations such as:

PL = Plate.

Additional information may specify material grade, holes, welds, edges, or finish requirements.

Angle Symbols

Angles are commonly shown as:

L4x4x1/2.

The notation identifies an angle with its leg dimensions and thickness.

Angles may be used for framing connections, bracing, stiffeners, support members, and miscellaneous steel.

Channel Symbols

Channels may be designated by a shape and size notation such as:

C10x15.3.

The exact designation depends on the structural shape standard being used.

HSS Symbols

Hollow structural sections are commonly identified using:

HSS 6x6x3/8.

HSS members can be square, rectangular, or round.

Because HSS connections can be more geometrically complex than conventional wide-flange connections, accurate detailing of cuts, plates, welds, and connection geometry is particularly important.

Steel Welding Symbols

Welding symbols are among the most important symbols found on steel fabrication drawings.

A welding symbol communicates information about the required weld, including its type, location, size, length, and other requirements.

Common weld types include:

Fillet weld.

Groove weld.

Plug weld.

Slot weld.

A weld symbol generally uses a reference line with additional graphical information and dimensions.

Fillet Weld Symbol

The fillet weld is one of the most common welds used in structural steel fabrication.

It is represented by a triangular symbol.

A notation such as:

1/4″ fillet weld.

communicates the required weld size.

The location of the weld symbol relative to the reference line also provides information about which side of the joint is to be welded.

Groove Weld Symbols

Groove welds are used when the connection requires welding within a groove formed between the members.

Various groove configurations are possible, including:

  • Square groove.
  • V-groove.
  • Bevel groove.
  • U-groove.
  • J-groove.

The specific symbol provides the welder and fabricator with information about the required joint preparation and welding configuration.

Weld Length

The length of a weld may also be specified.

For example, a drawing may indicate a weld of a particular size and length rather than requiring a continuous weld along the entire connection.

All-Around Weld

A circular symbol placed around the reference line indicates an all-around weld.

This is useful when the weld is required around the entire joint or perimeter represented by the drawing.

Field Weld

A flag symbol is commonly used to indicate a field weld, meaning the weld is intended to be performed at the jobsite rather than in the fabrication shop.

This distinction is critical because shop and field welding can involve different logistical and inspection considerations.

Bolt Symbols and Bolted Connections

Bolted connections are another major part of structural steel detailing.

A drawing may show bolt locations using circles, dimensions, spacing information, and bolt callouts.

Typical information can include:

  • Bolt diameter.
  • Bolt type.
  • Number of bolts.
  • Bolt spacing.
  • Gauge.
  • Edge distance.
  • Hole type.
  • Connection configuration.

For example, a connection may specify a particular number and size of high-strength structural bolts.

The drawing must make it clear not only how many bolts are required but also where the holes are located.

Common Hole Symbols

Hole information is essential for fabrication.

A drawing can specify holes for:

  • Structural bolts.
  • Anchor rods.
  • Welded connections.
  • Pins.
  • Miscellaneous attachments.

Hole callouts may identify the hole diameter, quantity, spacing, and type.

Different hole configurations may be required depending on the connection design. Accurate hole locations are particularly important because fabrication equipment may use the detailing information to produce CNC or automated cutting and drilling data.

Dimensioning Symbols in Steel Detailing

Dimensions are fundamental to every steel detail.

Steel detailing dimensions can define:

  • Overall member length.
  • Plate dimensions.
  • Hole spacing.
  • Bolt spacing.
  • Edge distances.
  • Elevations.
  • Member offsets.
  • Connection locations.
  • Material thickness.

Detailers must carefully distinguish between dimensions that control fabrication and dimensions that provide reference information.

A dimension that is off by even a small amount can create problems during fabrication or erection, especially when multiple members must fit together at the jobsite.

Section and Detail Symbols

Structural steel drawings frequently use section and detail references to provide more information than can be shown in the main view.

A detail bubble or section marker typically identifies:

  • Detail number.
  • Drawing or sheet reference.
  • Cutting plane.
  • Direction of view.

For example:

DETAIL 5/SK-12

may indicate that the reader should refer to Detail 5 on sheet SK-12.

These references allow complex connection information to be distributed across multiple drawings without overcrowding the main view.

Elevation Symbols

Steel erection depends heavily on accurate elevations.

Drawings may identify:

Top of Steel (TOS).

Bottom of Steel (BOS).

Top of Slab (TOSL).

Finished Floor Elevation (FFE).

Exact terminology can vary by project and company standards.

Elevation symbols help erectors understand where a member needs to be positioned vertically in relation to floors, slabs, roofs, foundations, and other structural elements.

Grid Line Symbols

Grid lines provide the coordinate system for many structural projects.

A steel column may be located at the intersection of:

Grid 3 and Grid C.

Rather than dimensioning every column from a building corner, the structural team can establish a common grid system.

This improves coordination between architectural, structural, MEP, and steel detailing drawings.

Member Marks

Member marks are one of the simplest but most important elements in structural steel detailing.

Examples include:

B101.

C25.

BR12.

PL08.

G1.

Each mark should correspond to a specific fabricated item or assembly.

The same member mark may appear on:

  • Shop drawings.
  • Erection drawings.
  • Piece drawings.
  • Bills of material.
  • CNC files.
  • Shipping documents.

This creates traceability from the design model to the fabrication shop and finally to the construction site.

Surface and Finish Symbols

Some steel components require additional surface treatment.

Depending on the project, drawings may communicate requirements related to:

  • Painting.
  • Priming.
  • Galvanizing.
  • Fireproofing.
  • Surface preparation.
  • Corrosion protection.

The exact notation depends on the project specifications and applicable standards.

Detailers should not assume that every steel member receives the same finish.

Camber Symbols

Certain structural beams may require camber to compensate for expected deflection under loading.

A camber note can identify:

  • Required camber.
  • Location of maximum camber.
  • Fabrication requirements.

Camber is especially relevant for long-span beams and some floor framing systems.

Incorrect interpretation of camber requirements can affect both fabrication and final structural geometry.

Match Lines and Continuation Symbols

Large buildings often require drawings to be divided into multiple plan areas.

Match lines indicate that a drawing continues onto another view or sheet.

This is especially useful on large commercial, industrial, and infrastructure projects where a single plan cannot show the entire structure at an appropriate scale.

Revision Symbols

Steel detailing drawings frequently undergo revisions during the project.

Revision symbols or delta symbols identify areas where changes have been made.

A revision may involve:

  • Member size.
  • Connection design.
  • Plate dimensions.
  • Bolt arrangement.
  • Weld requirements.
  • Geometry.
  • Member location.

Revision tracking is critical because fabrication should always be based on the current approved information.

Typical Steel Detailing Abbreviations

Along with graphical symbols, steel drawings use a wide range of abbreviations.

Some commonly encountered examples include:

Abbreviation Meaning
BEAM Beam
COL Column
BRG Bearing
PL Plate
L Angle
C Channel
HSS Hollow Structural Section
TYP Typical
EA Each
SIM Similar
U.N.O. Unless Noted Otherwise
TOS Top of Steel
EL Elevation
CL Centerline
O.C. On Center
MAX Maximum
MIN Minimum

The exact meaning and usage should always be checked against the project documents and detailing standards because office conventions can vary.

Steel Detailing Standards in the USA

For U.S. projects, steel detailing does not rely solely on a universal drawing style. Detailers typically work within a combination of project specifications, structural design documents, industry standards, and fabrication requirements.

Important organizations and standards commonly encountered in structural steel projects include:

AISC — American Institute of Steel Construction

AISC provides widely used standards and specifications for structural steel construction in the United States.

AWS — American Welding Society

AWS standards are particularly important for welding requirements and welding symbols.

ASTM International

ASTM standards cover many structural steel materials, fasteners, coatings, and related products.

RCSC — Research Council on Structural Connections

RCSC publications are important for structural bolting and connection requirements.

The applicable project documents should always take precedence over assumptions based on a general symbol library.

Steel Detailing Symbols in BIM and 3D Modeling

Modern steel detailing is increasingly performed within 3D BIM environments using platforms such as Tekla Structures, Autodesk Revit, and other detailing and fabrication software.

Even when the project is modeled in three dimensions, traditional drawing symbols remain important.

A BIM model can represent the physical geometry of a connection, but fabrication and erection drawings still need to communicate information such as:

  • Weld requirements.
  • Bolt information.
  • Dimensions.
  • Member marks.
  • Connection references.
  • Material information.
  • Erection sequences.

This makes accurate symbol generation an important part of automated drawing production.

Common Problems Caused by Incorrect Symbols

Incorrect or inconsistent symbols can create surprisingly expensive problems.

A misunderstood weld symbol could result in the wrong weld type.

An incorrect dimension could produce a plate with improperly located holes.

A missing field-weld indication could create confusion at the jobsite.

An incorrect member mark could cause the wrong piece to be loaded, shipped, or erected.

These errors can lead to:

Rework → fabrication delays → additional cost → field modifications → schedule impacts.

For this reason, quality control in steel detailing is not simply about checking dimensions. It also involves verifying the meaning and consistency of drawing symbols.

Best Practices for Steel Detailers

Professional steel detailing companies should maintain consistent standards for symbols, abbreviations, dimensions, and drawing presentation.

A strong detailing workflow typically includes checking that:

  1. Member marks are unique and consistent.
  2. Weld symbols accurately represent the design intent.
  3. Bolt and hole information is complete.
  4. Dimensions are coordinated with the model.
  5. Elevations are clearly identified.
  6. Details and sections are correctly referenced.
  7. Revisions are properly incorporated.
  8. Drawing annotations match the approved design documents.
  9. Shop and erection drawings remain coordinated.
  10. The final drawings are reviewed before release for fabrication.

Automated checking tools can help identify geometric conflicts, but experienced human review remains important because symbols communicate design intent as well as geometry.

Why Professional Steel Detailing Matters

Steel detailing sits between structural engineering and physical construction.

The structural engineer determines what the structure needs to accomplish. The steel detailer translates that design into information that fabricators and erectors can actually use.

That translation requires more than software knowledge.

A good detailer must understand structural steel shapes, connections, fabrication processes, welding, bolting, tolerances, erection requirements, drawing standards, and construction sequencing.

Steel detailing symbols are one part of this larger communication system, but they are an especially important part because they allow complex fabrication requirements to be communicated quickly and consistently.

Final Thoughts

Steel detailing symbols may appear simple, but they represent a highly developed technical language used throughout structural steel construction.

From beam and column marks to weld symbols, bolt notation, dimensions, elevations, sections, and connection references, every symbol has a purpose. When these symbols are used correctly, they help connect engineering design with fabrication and field erection.

For U.S. steel fabrication and construction projects, accurate detailing requires not only knowledge of symbols but also an understanding of applicable standards, project specifications, fabrication practices, and the needs of the erector.

Ultimately, a good steel detail drawing should leave as little room for interpretation as possible. The clearer the drawing, the easier it is for the fabricator to build the piece correctly and for the erector to install it efficiently.

For steel detailing companies serving contractors, fabricators, engineers, and general contractors across the United States, investing in experienced detailers and a rigorous drawing review process can make a significant difference in fabrication accuracy, project coordination, and overall construction efficiency.


https://www.simsona.com/wp-content/uploads/2025/03/simsona-logo-2025.png 0 0 Praveen Kumar https://www.simsona.com/wp-content/uploads/2025/03/simsona-logo-2025.png Praveen Kumar2026-09-18 11:59:122026-09-18 12:01:26Steel Detailing Symbols: A Practical Guide || Simsona

Beam Connection Details (With Drawings): Types, Components, and Design Considerations

September 8, 2026/in Blogs/by admin

Bim connection details


Beam connections are among the most important details in structural steel construction. A steel beam may be designed to carry substantial vertical and lateral loads, but its performance depends heavily on how those loads are transferred into columns, girders, walls, or other structural members.

A beam connection is the structural interface between two or more members. It must safely transfer the forces generated by the structure while also being practical to fabricate, transport, erect, inspect, and maintain.

Common steel beam connections include shear connections, moment connections, beam-to-column connections, beam-to-girder connections, end-plate connections, angle connections, and seated connections.

Understanding these connections is essential for structural engineers, steel detailers, fabricators, contractors, and anyone involved in structural steel construction.

This guide explains the most common beam connection details, how they work, where they are used, their major components, and what should be considered when preparing structural and steel shop drawings.


What Is a Beam Connection?

A beam connection is a structural connection used to connect a beam to another structural member, such as a:

  • Steel column
  • Steel girder
  • Steel beam
  • Braced frame
  • Concrete or masonry wall
  • Structural support

The connection transfers forces from the supported beam into the supporting structure.

Depending on the structural system, a beam connection may primarily transfer:

  • Shear
  • Axial force
  • Bending moment
  • Torsion
  • Or a combination of these forces

The type of connection selected depends on the structural behavior required by the design.

For example, a simple shear connection is generally intended to allow rotation while transferring vertical shear. A moment connection, by contrast, is designed to transfer significant bending moment as well as shear.


Basic Beam Connection Diagram

A simple way to visualize a typical steel beam-to-column connection is:

             STEEL BEAM
    =========================
             |       |
             |  Bolts|
             |   o   |
             |   o   |   Connection Plate
             |   o   |      │
             |       |      │
             =================
                    │
                    │
              STEEL COLUMN
              │         │
              │         │
              │         │
              │         │

The actual configuration varies significantly depending on the connection type, structural requirements, member sizes, and project specifications.


Why Are Beam Connections Important?

The connection is often one of the most highly detailed portions of a steel structure.

Even when the beam and column themselves are adequately designed, an improperly detailed connection can create problems during fabrication or erection.

A properly designed and detailed connection should:

  1. Transfer the required structural forces.
  2. Provide adequate strength and stiffness.
  3. Accommodate required movement or rotation.
  4. Be practical to fabricate.
  5. Be practical to erect.
  6. Provide appropriate access for bolts and welding.
  7. Coordinate with surrounding structural and architectural elements.

The connection must therefore be considered as part of the overall structural system rather than simply as a collection of bolts and plates.


Main Types of Beam Connections

Steel beam connections can generally be divided into two broad categories:

Simple or Shear Connections

These connections are primarily designed to transfer shear while allowing the beam to rotate relative to its support.

Moment Connections

These connections are designed to transfer bending moment in addition to shear and generally provide substantially greater rotational restraint.

Within these categories are several common connection configurations.


1. Shear Tab Connection

A shear tab connection, also called a single-plate connection, is one of the most common simple beam connections.

A vertical plate is welded to the supporting member and bolted to the web of the supported beam.

Typical Detail

        BEAM
 =========================
          │
          │ o
          │ o
          │ o
          │
          │
          │
          │
          │
          │
       ┌──┴──┐
       │ TAB │
       │PLATE│
       └──┬──┘
          │
          │
       COLUMN

The connection plate is typically shop-welded to the supporting member and field-bolted to the beam web.

Main Components

  • Shear tab plate
  • Bolts
  • Beam web
  • Supporting column or girder
  • Shop weld

Applications

Shear tab connections are frequently used for:

  • Beam-to-column connections
  • Beam-to-girder connections
  • Secondary beams
  • Gravity framing

Advantages

  • Relatively simple
  • Economical
  • Fast to fabricate
  • Fast to erect
  • Relatively easy to detail

The connection must still be checked for the required shear forces and applicable limit states.


2. Double-Angle Connection

A double-angle connection uses two angles to connect the beam web to the supporting member.

One angle is positioned on each side of the beam web.

Typical Detail

              BEAM
      =================
           │     │
         o │     │ o
         o │     │ o
           │     │
        ┌──┘     └──┐
        │ ANGLE  ANGLE│
        └─────┬──────┘
              │
           COLUMN

The angles can be connected to the supporting member and beam using bolts or appropriate welding arrangements.

Advantages

  • Simple fabrication
  • Common detailing solution
  • Can accommodate beam rotation
  • Useful for conventional gravity framing

Double-angle connections have been widely used in steel construction and remain an important connection type.


3. End-Plate Connection

An end-plate connection uses a plate attached to the end of a steel beam.

The beam end plate is then bolted to the supporting column or girder.

Typical Detail

       STEEL BEAM
 =========================
                        │
                        │
                        │ END PLATE
                        │┌─────────┐
                        ││ o     o │
                        ││         │
                        ││ o     o │
                        │└─────────┘
                        │
                     COLUMN
                     │     │
                     │     │
                     │     │

End-plate connections can be designed for different structural behaviors.

They may be used as:

  • Simple shear connections
  • Moment connections

The exact geometry, plate thickness, bolt arrangement, welds, and stiffening depend on the design requirements.


4. Extended End-Plate Moment Connection

An extended end-plate connection extends the connection plate beyond the beam flanges.

High-strength bolts connect the end plate to the supporting column.

Conceptual Detail

                 BEAM
      =========================
      =========================
                  │
          o       │       o
                  │
          o       │       o
                  │
          o       │       o
      ────────────┼────────────
              END PLATE
                  │
              COLUMN
              │       │
              │       │
              │       │

The extended plate and bolt arrangement provide a mechanism for transferring beam moment into the column.

These connections are commonly associated with moment-resisting steel frames.

Important Considerations

  • Bolt strength
  • Plate thickness
  • Bolt arrangement
  • Welds
  • Beam flange forces
  • Column flange behavior
  • Panel-zone behavior
  • Local yielding
  • Stiffeners where required

Moment connections require substantially more engineering consideration than simple shear connections.


5. Flush End-Plate Connection

In a flush end-plate connection, the end plate generally remains within the overall depth of the beam.

       BEAM
 =====================
                     │
                  ┌──┴──┐
                  │o  o │
                  │o  o │
                  └──┬──┘
                     │
                   COLUMN
                   │   │
                   │   │

Flush end plates can be used where connection geometry or architectural constraints limit the extension of the connection beyond the beam profile.

The connection capacity depends on the specific configuration and design requirements.


6. Top-and-Seat Angle Connection

A top-and-seat angle connection uses angles near the top and bottom portions of the beam.

The seat angle provides bearing support while the top angle helps restrain the beam.

Conceptual Detail

             BEAM
       =================
          │         │
       ┌──┴─────────┴──┐
       │   TOP ANGLE   │
       └───────────────┘

          BEAM WEB
             │
             │
       ┌───────────────┐
       │  SEAT ANGLE   │
       └───────────────┘

             COLUMN
             │   │
             │   │
             │   │

This type of connection has historically been used in various steel framing applications.


7. Seated Beam Connection

A seated connection supports the beam on a structural seat attached to the column.

The seat provides direct bearing for the beam.

Typical Concept

            BEAM
    ======================
                  │
                  │
           ┌──────┴──────┐
           │    SEAT     │
           └─────────────┘
                 │
              COLUMN
              │     │
              │     │
              │     │

The seat can be formed using a plate or structural angle depending on the design.

The connection may also include a top angle, bolts, or other components to provide additional restraint.


8. Beam-to-Girder Connection

Not every beam connects directly to a column.

Secondary beams often connect to larger primary beams or girders.

             SECONDARY BEAM
                  │
                  │
        ┌─────────┴─────────┐
        │                   │
        │     PRIMARY       │
        │      GIRDER       │
        │                   │
        └───────────────────┘

Common connection configurations include:

  • Shear tabs
  • Double angles
  • End plates
  • Seated connections

One important consideration is the location of the connection relative to the girder web and flanges.


9. Beam-to-Column Moment Connection

Moment connections are used when the frame is required to resist significant bending moments.

A simplified representation is:

              BEAM
================================
===============================
          ║          ║
          ║ CONNECTION║
          ║   ZONE    ║
          ║          ║
          ║          ║
             COLUMN
             │    │
             │    │
             │    │

The connection transfers both shear and moment between the beam and column.

Moment connections can be constructed using:

  • Welded beam flanges
  • Bolted end plates
  • Flange plates
  • Bolted flange connections
  • Stiffened configurations
  • Other engineered connection systems

The exact connection depends on the structural system and design requirements.


Simple Connection vs. Moment Connection

Understanding the difference between these two categories is essential.

Feature Simple Shear Connection Moment Connection
Primary force Shear Moment + shear
Beam rotation Generally permitted More strongly restrained
Connection stiffness Relatively low Relatively high
Typical components Shear plate, angles, bolts End plates, flange connections, stiffeners
Typical application Gravity framing Moment-resisting frames
Complexity Lower Higher
Fabrication Generally simpler Generally more complex

The distinction is based on structural behavior, not merely on how many bolts or plates appear in the detail.


Components of a Typical Beam Connection

A steel beam connection can contain numerous components.

Connection Plates

Plates may be used to transfer shear, moment, axial force, or combinations of forces.

Examples include:

  • Shear tabs
  • End plates
  • Flange plates
  • Gusset plates
  • Stiffener plates
  • Continuity plates

Bolts

Bolts provide mechanical fastening between steel components.

Important bolt information includes:

  • Diameter
  • Grade
  • Quantity
  • Spacing
  • Edge distance
  • Hole size
  • Installation requirements

High-strength structural bolts are commonly used in steel construction.


Welds

Welding can be used to connect:

  • Plates to beams
  • Plates to columns
  • Stiffeners
  • Flange plates
  • Connection components

Shop welding and field welding should be clearly distinguished in project documentation.


Stiffeners

Stiffener plates may be required to strengthen portions of beams or columns around heavily loaded connections.

They can help address issues such as:

  • Local yielding
  • Web crippling
  • Web buckling
  • Flange bending
  • Concentrated forces

Whether stiffeners are required is a design-specific decision.


What Information Should Be Shown in Beam Connection Drawings?

A beam connection detail should communicate enough information for fabrication and erection.

Depending on the project, this may include:

Member Information

  • Beam designation
  • Column designation
  • Steel grade
  • Member orientation

Connection Information

  • Plate sizes
  • Plate thicknesses
  • Bolt sizes
  • Bolt grades
  • Number of bolts
  • Hole sizes
  • Weld sizes
  • Weld types

Geometric Information

  • Connection dimensions
  • Bolt spacing
  • Edge distances
  • Elevations
  • Offsets
  • Clearances

Identification

  • Piece marks
  • Detail references
  • Grid references
  • Revision information

The drawing should be coordinated with the overall structural model and approved design information.


Beam Connection Detailing Process

Preparing a beam connection detail generally involves several stages.

1. Review the Structural Drawings

The detailer first reviews:

  • Structural plans
  • Elevations
  • Sections
  • Connection schedules
  • General notes
  • Project specifications

2. Identify the Connection Type

The required connection type is determined from the design documents and structural requirements.

For example:

Beam → Column → Shear connection

or

Beam → Column → Moment connection


3. Develop the Connection Geometry

The detailer develops the connection components based on the approved engineering information.

This may involve:

  • Plates
  • Angles
  • Bolts
  • Welds
  • Stiffeners
  • Cutouts

4. Check Clearances

The connection must be checked against surrounding components.

Important clearances can include:

  • Bolt access
  • Welding access
  • Beam flange clearance
  • Column flange clearance
  • MEP clearance
  • Architectural clearance

5. Create the Shop Drawing

The connection information is then incorporated into the appropriate shop or fabrication drawing.


6. Perform Quality Control

The final detail should be checked for:

  • Dimensions
  • Bolt locations
  • Weld information
  • Material specifications
  • Piece marks
  • Coordination
  • Design consistency

Beam Connections in BIM

Modern steel detailing increasingly uses 3D BIM models rather than relying solely on 2D drawings.

A BIM model allows the detailer to visualize the connection in three dimensions.

For example, the model can show:

  • Beam
  • Column
  • Connection plates
  • Bolts
  • Welded components
  • Stiffeners
  • Adjacent members

This helps identify clashes and constructability issues before fabrication.

A typical workflow is:

Structural Design → 3D Steel Model → Connection Detailing → Clash Detection → Shop Drawings → Fabrication → Erection

Software such as Tekla Structures, SDS/2, and Autodesk Revit can support different aspects of this workflow.


Beam Connection Detailing: Common Mistakes

Even small detailing mistakes can create problems in fabrication and erection.

Incorrect Bolt Spacing

Incorrect bolt spacing can prevent the connection from being assembled correctly.

Insufficient Edge Distance

Bolts placed too close to plate edges can create structural and fabrication problems.

Missing Weld Information

A missing or incorrect weld size can cause ambiguity during fabrication.

Incorrect Beam Length

Incorrect dimensions can result in field modifications.

Poor Access for Bolting

Bolts may be technically shown but physically impossible to install because of surrounding members.

MEP Interference

A beam connection may conflict with ducts, pipes, cable trays, or equipment.

Incorrect Piece Marks

Inconsistent marks can make fabrication and erection more difficult.

Failure to Incorporate Revisions

A revised connection must be updated consistently across the model and drawings.


Connection Design vs. Connection Detailing

These terms are sometimes used interchangeably, but they represent different activities.

Connection Design

Connection design determines whether the connection has sufficient strength and appropriate structural behavior.

It involves engineering calculations and consideration of relevant limit states.

Connection Detailing

Connection detailing translates the approved design into precise fabrication and erection information.

A detailer may model:

  • Plate dimensions
  • Bolt locations
  • Welds
  • Stiffeners
  • Cuts
  • Assembly geometry

The detailer should work within the project’s engineering requirements and approval procedures.


Steel Beam Connection Drawings and Shop Drawings

Beam connection details are an integral part of steel shop drawings.

A typical fabrication drawing may contain:

  1. Member identification
  2. Main dimensions
  3. Connection details
  4. Bolt information
  5. Weld information
  6. Material specifications
  7. Piece marks
  8. Assembly references

The information should be consistent between the individual piece drawing, assembly drawing, erection drawing, and 3D model.

This consistency is particularly important on large projects where thousands of components may be fabricated.


How to Choose the Right Beam Connection

There is no single connection type that is best for every project.

Selection depends on factors such as:

  • Applied loads
  • Required structural behavior
  • Beam size
  • Column size
  • Available space
  • Fabrication requirements
  • Erection requirements
  • Cost
  • Architectural constraints
  • Fire protection
  • Seismic requirements
  • Applicable codes and specifications

The structural engineer is responsible for determining the required structural performance, while detailing and fabrication teams ensure that the selected connection can be accurately manufactured and installed.


Beam Connection Details for Different Applications

Commercial Buildings

Commercial buildings commonly use a combination of:

  • Shear tabs
  • Double-angle connections
  • End plates
  • Moment connections
  • Bracing connections

Industrial Buildings

Industrial structures may require more specialized connections because of:

  • Heavy equipment
  • Crane loads
  • Large spans
  • Dynamic loading
  • Pipe supports

High-Rise Buildings

High-rise steel structures often require highly engineered connections capable of transferring significant gravity and lateral forces.

Industrial Platforms

Platforms frequently use simple beam-to-beam and beam-to-column connections, although connection requirements vary depending on loading and framing.

Bridges

Steel bridge connections can involve substantially different detailing requirements from building structures and should follow the applicable bridge design and fabrication standards.


Frequently Asked Questions

What is the most common steel beam connection?

Shear tab or single-plate connections are among the commonly used simple beam connections in steel framing. The appropriate connection depends on the project design.

What is a beam-to-column connection?

It is a structural connection that transfers forces between a beam and supporting column. It may be designed as a simple shear connection or a moment connection.

What is the difference between a shear and moment connection?

A shear connection is primarily intended to transfer shear while allowing rotation, whereas a moment connection provides substantially greater rotational restraint and transfers bending moment in addition to shear.

What are beam connection plates?

Connection plates are steel plates used to connect structural members. Examples include shear tabs, end plates, flange plates, gusset plates, and stiffener plates.

Are beam connections welded or bolted?

They can be either welded, bolted, or a combination of both. Shop welding and field bolting are common because they can make site erection faster and more practical.

What are beam shop drawings?

Beam shop drawings provide detailed fabrication information for individual steel beams, including dimensions, cuts, holes, plates, bolts, welds, and other connection components.

Why are beam connection details important in steel detailing?

They provide the information needed to fabricate and erect the connection accurately. Good detailing can reduce fabrication errors, field modifications, rework, and construction delays.


Conclusion

Beam connections may represent only a small portion of a structural steel project, but they play a critical role in transferring forces safely between structural members.

From simple shear tab and double-angle connections to more complex end-plate and moment connections, each configuration has a specific structural purpose and detailing requirement.

Accurate beam connection details must consider not only structural requirements but also fabrication, bolting, welding, erection, accessibility, coordination, and constructability.

Modern steel detailing increasingly combines 3D BIM modeling, connection detailing, clash detection, shop drawings, and digital fabrication workflows. This allows connection problems to be identified earlier and provides fabricators and erectors with more reliable information.

Ultimately, a good beam connection detail is more than a drawing of bolts and plates. It is a carefully coordinated representation of how the structural members will actually come together in the finished building.

Accurate connection detailing is therefore essential to turning structural design intent into safe, efficient, and constructible steelwork.

If you want, I can also create a more SEO-focused version with actual connection-detail illustration prompts/diagram placements, targeting keywords such as “beam connection details,” “steel beam connection details,” “beam-to-column connection details,” “steel connection drawings,” and “structural steel detailing.”

https://www.simsona.com/wp-content/uploads/2025/03/simsona-logo-2025.png 0 0 admin https://www.simsona.com/wp-content/uploads/2025/03/simsona-logo-2025.png admin2026-09-08 12:34:122026-09-08 13:15:27Beam Connection Details (With Drawings): Types, Components, and Design Considerations

PVC Windows:  How to Choose the Right Window || Simsona

September 8, 2026/in Blogs/by admin

pvc window


PVC windows have become a popular choice for modern residential and commercial buildings because they combine thermal insulation, durability, low maintenance and design flexibility. Unlike older window systems that often focused primarily on basic weather protection, today’s PVC windows can be engineered for significantly better energy efficiency, security and acoustic performance.

Modern systems use advanced multi-chamber profiles, multiple sealing gaskets, insulated glazing units and warm-edge spacer technology to reduce heat transfer through the window. The result is a more comfortable indoor environment and, in suitable buildings, lower heating and cooling requirements.

Among the different high-performance systems available on the market are designs such as IGLO EDGE, IGLO Energy and IGLO Premier, which demonstrate how PVC window technology has evolved from conventional profiles to highly insulated and technically advanced systems.

What Is a PVC Window?

PVC windows are windows manufactured using polyvinyl chloride, commonly known as PVC. The material is formed into hollow profiles that contain internal chambers. These chambers help improve the thermal and structural characteristics of the window while keeping the profile relatively lightweight.

The PVC profile forms the main frame and sash of the window. Glass units are installed inside the sash, while sealing gaskets are positioned around the glazing and opening areas to reduce air and water infiltration.

Modern PVC windows can also incorporate sophisticated hardware, reinforced locking points, ventilation mechanisms and a variety of surface finishes. This allows the same basic material to be used for traditional homes, contemporary residences, offices and commercial buildings.

How Do Multi-Chamber PVC Window Profiles Work?

One of the important developments in PVC window design is the use of multi-chamber profiles. Instead of having a simple hollow section, the profile is divided into multiple internal chambers.

These chambers interrupt the path through which heat can travel from the warmer side of the window to the colder side. Increasing the number and arrangement of chambers can therefore contribute to better thermal insulation.

However, the number of chambers alone does not determine the performance of a window. The overall thermal performance depends on several components, including the profile geometry, glazing, gaskets, spacer, frame size and installation quality.

For example, the IGLO EDGE system uses a 7-chamber profile together with three EPDM gaskets. This combination is designed to create a highly insulated window assembly.

Why Are Gaskets Important in PVC Windows?

Gaskets are essential components of a modern window because they help create an effective seal between the moving and fixed parts of the window.

A high-quality sealing system can help reduce unwanted air leakage and protect against wind-driven rain. It can also contribute to the overall thermal and acoustic performance of the window.

Modern PVC systems may use multiple sealing levels rather than relying on a single gasket. IGLO EDGE, for example, uses three EPDM gaskets, including a central gasket.

EPDM, or ethylene propylene diene monomer, is a synthetic rubber commonly used where resistance to weathering, temperature changes and aging is important.

The central gasket is particularly significant in systems designed around higher levels of insulation because it creates an additional sealing zone between the interior and exterior portions of the window.

Understanding the U-Value of a PVC Window

When comparing energy-efficient windows, one of the most important technical specifications is the U-value.

The U-value indicates how readily heat passes through a building component. A lower U-value generally means better thermal insulation.

It is important to distinguish between the U-value of the glass and the U-value of the complete window.

The glass U-value is commonly represented as Ug, while the overall window U-value is represented as Uw. The complete Uw value takes into account the frame, glazing and other components of the window assembly.

The IGLO EDGE system is specified with a Uw value of up to 0.66 W/(m²K) under the stated configuration. Its glazing specification includes a double-chamber glazing package with a Ug value of 0.5 W/(m²K).

These figures illustrate an important point: high window performance does not come from the glass alone. The frame, spacer, seals and overall construction all contribute to the final performance of the window.

The Importance of High-Performance Glazing

Glass can represent a substantial portion of a window’s surface area, so glazing has a major influence on thermal performance.

Traditional single glazing provides relatively limited insulation compared with modern insulated glass units. Double glazing introduces an insulating space between two panes, while more advanced configurations can use additional panes and insulating cavities.

The IGLO EDGE specification, for example, includes a double-chamber glazing package with a Ug value of 0.5 W/(m²K). Such glazing can substantially reduce heat transfer compared with conventional single-glazed windows.

When selecting glazing, homeowners should consider more than thermal insulation. Solar control, visible light transmission, acoustic performance, safety and the orientation of the building can also influence the most appropriate glass specification.

What Is a Warm-Edge Spacer?

The spacer sits between the panes of an insulated glass unit and helps maintain the separation between them.

Traditional metallic spacers can create a relatively conductive path around the edge of the glass. Warm-edge spacer technology uses materials and designs intended to reduce heat transfer through this area.

The IGLO EDGE system specifies a Swisspacer Ultimate warm-edge spacer. This type of component can help improve the thermal performance of the glazing edge and reduce the risk of condensation in suitable conditions.

The spacer may appear to be a small component, but it demonstrates how modern window performance depends on the interaction of many individual parts.

PVC Window Security Features

Energy efficiency is only one consideration when choosing windows. Security is equally important, particularly for ground-floor residential and commercial applications.

Modern PVC windows can incorporate multiple locking points and anti-theft hardware. The exact configuration depends on the window dimensions, sash design and hardware system.

The IGLO EDGE specification includes four anti-theft strikers according to the size of the sash and hardware configuration. It also includes a handle misplacement locking mechanism.

Such features are designed to make the hardware more resistant to incorrect operation and unauthorized opening.

Microventilation in PVC Windows

Modern windows need to balance airtightness with ventilation.

Highly sealed windows can significantly reduce uncontrolled air leakage, but buildings still require adequate ventilation to maintain indoor air quality and control moisture.

Microventilation mechanisms allow a small opening position to be created without fully opening the window. This can provide controlled background ventilation in suitable conditions.

The IGLO EDGE system includes microventilation as part of its standard equipment.

However, microventilation should not be considered a substitute for a properly designed building ventilation system. The appropriate ventilation strategy depends on the building, climate and occupancy.

PVC Window Handles and Hardware

Hardware influences how a window operates on a daily basis. Handles, hinges, locking mechanisms and other components must work together to provide reliable opening, closing and ventilation.

The IGLO EDGE specification includes a DUBLIN aluminium window handle, along with a handle misplacement locking mechanism.

Hardware selection also affects the appearance of the window. A well-designed handle can complement the frame and interior finishes while providing a comfortable operating mechanism.

IGLO EDGE: A High-Performance PVC Window System

IGLO EDGE represents a modern approach to PVC window design, combining a contemporary angular profile with a high level of thermal insulation.

Its specified Uw value of 0.66 W/(m²K) is supported by a combination of technologies rather than a single feature. The system uses a 7-chamber profile, three EPDM gaskets including a central gasket, insulated glazing and a warm-edge spacer.

The standard specification also includes features such as anti-theft strikers, microventilation, a handle misplacement locking mechanism and a range of profile and veneer colours.

Another notable manufacturing feature is V-perfect welding, a technique intended to create a cleaner visual appearance at the corners of the PVC frame.

This makes the system particularly interesting for projects where both energy performance and contemporary appearance are important.

IGLO Energy: Combining Design and Energy Efficiency

IGLO Energy is positioned as a solution for customers looking for modern design combined with high energy efficiency.

The concept behind an energy-efficient PVC window is not simply to increase insulation in one component. Instead, the frame, glazing, seals and hardware must work together as one system.

A well-designed high-performance window can help reduce unwanted heat transfer and contribute to a more stable indoor temperature. In buildings where heating represents a significant portion of energy consumption, improving the building envelope can be an important part of an overall energy-efficiency strategy.

The exact performance of any window, however, depends on its configuration and installation. Product specifications should therefore be evaluated using the complete window’s tested or calculated performance rather than relying only on individual component values.

IGLO Premier: A-Class PVC Profile

IGLO Premier takes a somewhat different approach, using an extremely warm 5-chamber A-class profile manufactured from primary material.

The system incorporates double sealing and reliable window fittings, providing a combination of thermal insulation, durability and practical operation.

The use of an A-class profile is relevant because PVC profile classifications are associated with wall thickness and profile characteristics. When evaluating different systems, buyers should look beyond the number of chambers and consider the complete technical specification.

IGLO Premier demonstrates that a high-performing PVC window does not necessarily need to rely on the same profile configuration as another product. Different systems can achieve their intended performance through different combinations of profile geometry, material, glazing and sealing technology.

PVC Window Colours and Finishes

One advantage of PVC windows is the wide range of finishes available.

White remains one of the most common choices, but modern PVC windows can be produced with coloured profiles and decorative veneers that imitate materials such as wood.

The IGLO EDGE system, for example, offers three basic profile colours: white, brown and anthracite, together with a wider selection of PVC veneer colours.

This allows the same window technology to be adapted to different architectural styles.

Anthracite and other dark finishes are particularly popular in contemporary architecture, while wood-effect finishes can be used where homeowners want a more traditional appearance without the maintenance requirements associated with natural timber.

PVC Windows for Different Architectural Styles

PVC windows are not limited to one particular type of building.

They can be used in new residential construction, renovations, apartments, offices and many other applications. Tilt-and-turn configurations are particularly common because they provide both conventional opening and tilted ventilation positions.

Some systems are also designed for outward-opening windows. IGLO Premier, for example, is described as an outward-opening tilt-and-turn system.

The choice between inward- and outward-opening configurations depends on the building design, available space, local practices and hardware requirements.

PVC Windows vs. Aluminium Windows

PVC and aluminium windows each have advantages.

PVC generally provides good thermal insulation because the profile itself is a relatively poor conductor of heat and can incorporate multiple insulating chambers. It also tends to require relatively little maintenance.

Aluminium, on the other hand, can provide high structural strength and slim sightlines. Modern thermally broken aluminium systems can also achieve strong energy performance.

The best choice therefore depends on the project’s priorities. PVC may be attractive when thermal insulation, cost efficiency and low maintenance are major considerations, while aluminium may be preferred where very large openings, slim profiles or specific architectural requirements are important.

PVC Windows vs. Wooden Windows

Wooden windows have a traditional appearance and can provide good thermal performance when properly designed and maintained.

However, natural wood requires periodic maintenance to protect it from moisture and weather exposure.

PVC windows can reproduce some of the visual characteristics of timber through decorative finishes while generally requiring less routine maintenance.

For homeowners choosing between the two, appearance, maintenance expectations, budget, thermal performance and architectural character should all be considered.

How to Choose the Right PVC Window

Choosing a PVC window should involve more than comparing prices or counting the number of chambers.

Start by looking at the Uw value of the complete window, because this provides a better indication of overall thermal performance than the Ug value of the glass alone.

Next, examine the glazing specification. Double glazing may be sufficient for some projects, while highly energy-efficient buildings may benefit from more advanced glazing configurations.

The sealing system is also important. Multiple gaskets and a properly designed central seal can improve airtightness and contribute to overall performance.

Hardware should be evaluated for security, durability and ease of operation. Buyers should also consider ventilation requirements, acoustic performance, solar control, frame appearance and installation quality.

Finally, the window should be selected according to the building’s climate and design requirements rather than simply choosing the system with the lowest published U-value.

Why Installation Matters

Even an excellent window can perform poorly if it is installed incorrectly.

The connection between the window frame and the surrounding wall must be properly designed and sealed. Poor installation can create air leakage, thermal bridges, water infiltration and condensation problems.

For this reason, window performance should be considered as part of the complete building envelope.

The frame, glazing, seals, wall connection and surrounding construction all contribute to the real-world performance of the finished installation.

Are PVC Windows Energy Efficient?

Modern PVC windows can be highly energy efficient, particularly when they combine insulated multi-chamber profiles, high-performance glazing, warm-edge spacers and effective sealing systems.

Systems such as IGLO EDGE illustrate this approach by combining a 7-chamber profile, three EPDM gaskets, insulated glazing and a warm-edge spacer.

However, the energy performance of a window should always be evaluated using the complete Uw value and the actual configuration being purchased.

Final Thoughts

PVC window technology has developed considerably beyond the basic white plastic windows associated with older construction.

Modern systems combine multi-chamber profiles, advanced glazing, multiple sealing levels, warm-edge spacers and sophisticated hardware to improve thermal insulation, security, comfort and appearance.

IGLO EDGE demonstrates a highly insulated approach based on a 7-chamber profile, three EPDM gaskets and high-performance glazing. IGLO Energy focuses on the combination of modern design and energy efficiency, while IGLO Premier uses a 5-chamber A-class profile with double sealing and reliable fittings.

For homeowners, architects and builders, the most important consideration is not simply choosing a window with the most chambers or the lowest individual glass U-value. Instead, the complete window system should be evaluated—including the profile, glazing, seals, spacer, hardware and installation.

When these components are properly matched, PVC windows can provide an effective combination of thermal efficiency, durability, security, low maintenance and modern design.

Frequently Asked Questions


Are PVC windows good for energy efficiency?

Yes. Modern PVC windows can provide strong thermal insulation when they use well-designed multi-chamber profiles, efficient glazing and effective sealing systems.

What does Uw mean on a window?

Uw represents the thermal transmittance of the complete window, including the frame and glazing. A lower Uw generally indicates better thermal insulation.

What is the difference between Uw and Ug?

Ug refers to the thermal transmittance of the glazing, while Uw refers to the performance of the complete window assembly.

Are 7-chamber PVC windows better than 5-chamber windows?

Not necessarily. The number of chambers is only one factor. Profile design, material, glazing, gaskets, spacer technology and installation all influence the final performance of a window.

Do PVC windows require a lot of maintenance?

PVC windows generally require relatively little routine maintenance compared with painted timber windows. Regular cleaning and periodic inspection of seals and hardware are normally sufficient.

Can PVC windows be made to look like wood?

Yes. Many PVC window systems are available with decorative veneers and wood-effect finishes.

Are PVC windows secure?

Modern PVC windows can incorporate multiple locking points, anti-theft strikers and other security features. The actual level of security depends on the hardware and configuration selected.

What is a warm-edge spacer?

A warm-edge spacer is a component positioned between the panes of an insulated glass unit. Its design helps reduce heat transfer around the edge of the glazing compared with conventional highly conductive spacer materials.

https://www.simsona.com/wp-content/uploads/2025/03/simsona-logo-2025.png 0 0 admin https://www.simsona.com/wp-content/uploads/2025/03/simsona-logo-2025.png admin2026-09-08 12:27:322026-09-08 12:27:32PVC Windows:  How to Choose the Right Window || Simsona

Steel Detailing Workflow Step by Step: From Structural Design to Fabrication || Simsona

August 14, 2026/in Blogs/by admin
Read more
https://www.simsona.com/wp-content/uploads/2025/03/simsona-logo-2025.png 0 0 admin https://www.simsona.com/wp-content/uploads/2025/03/simsona-logo-2025.png admin2026-08-14 11:24:072026-08-14 11:24:07Steel Detailing Workflow Step by Step: From Structural Design to Fabrication || Simsona

Steel Detailing vs Structural Steel Detailing: What’s the Difference?

July 30, 2026/in Blogs/by admin

Steel Detailing and structural steel detailing

Introduction

In the construction and structural engineering industry, the terms steel detailing and structural steel detailing are often used interchangeably. While they are closely related, they are not exactly the same. Understanding the distinction can help architects, engineers, fabricators, contractors, and project owners choose the right detailing services for their projects.

Structural steel detailing is a specialised branch of steel detailing that focuses on the primary load-bearing framework of buildings, bridges, industrial plants, warehouses, stadiums, and other infrastructure. Steel detailing, on the other hand, is a broader discipline that also includes miscellaneous and architectural steel components.

In this guide, we’ll explain the differences, applications, deliverables, and benefits of each service, helping you determine which solution best fits your project.

What Is Steel Detailing?

Steel detailing is the process of producing accurate fabrication and erection drawings for steel components used in construction projects. These detailed drawings ensure every steel element is manufactured, assembled, and installed according to the engineer’s design specifications.

Steel detailing acts as the bridge between structural design and fabrication. Detailers convert engineering calculations into practical shop drawings that fabricators and erectors use throughout the construction process.

A complete steel detailing package typically includes:

  • Shop drawings.
  • Erection drawings.
  • Fabrication drawings.
  • Material take-offs.
  • Bolt schedules.
  • Weld details.
  • CNC files.
  • Assembly drawings.
  • Bills of Materials (BOM).

Steel detailing covers a wide range of steel products, including structural, miscellaneous, and architectural steel.

What Is Structural Steel Detailing?

Structural steel detailing is a specialised discipline that focuses exclusively on the primary structural framework of a building or industrial facility.

These members are responsible for supporting the loads of the structure and transferring them safely to the foundation.

Structural steel detailing generally includes:

  • Columns.
  • Beams.
  • Girders.
  • Trusses.
  • Bracing systems.
  • Base plates.
  • Gusset plates.
  • Connection plates.
  • Anchor bolts.
  • Structural connections.

Every structural steel member must be accurately detailed to ensure proper fabrication, transportation, and installation while complying with project specifications and applicable design codes.

Steel Detailing vs Structural Steel Detailing

Feature Steel Detailing Structural Steel Detailing
Definition Broad discipline covering all steel components Focused on primary structural members
Scope Structural, miscellaneous, and architectural steel Structural load-bearing steel only
Components Railings, stairs, ladders, platforms, canopies, structural steel Beams, columns, braces, trusses, girders, connections
Purpose Fabrication of all steel products Structural integrity and safe load transfer
Deliverables Shop drawings, fabrication drawings, BOMs Structural shop drawings, connection details, erection drawings
Typical Projects Commercial, industrial, residential, infrastructure High-rise buildings, bridges, industrial plants, warehouses

Types of Steel Detailing

1. Structural Steel Detailing

This service focuses on the building’s structural skeleton and includes:

  • Beam detailing.
  • Column detailing.
  • Truss detailing.
  • Bracing detailing.
  • Steel connection detailing.
  • Base plate detailing.
  • Anchor bolt detailing.

2. Miscellaneous Steel Detailing

Miscellaneous steel detailing covers non-primary steel components such as:

  • Staircases.
  • Handrails.
  • Guardrails.
  • Ladders.
  • Platforms.
  • Catwalks.
  • Pipe supports
  • Equipment supports.
  • Roof access systems.

3. Architectural Steel Detailing

Architectural steel detailing emphasises aesthetics as well as functionality.

Common applications include:

  • Decorative staircases
  • Feature steelwork
  • Glass support systems
  • Architectural canopies
  • Façade support framing
  • Ornamental steel

Why Structural Steel Detailing Matters ?

Accurate structural steel detailing directly impacts the success of a construction project.

Improved Fabrication Accuracy

Detailed shop drawings minimise fabrication errors and reduce costly rework.

Faster Construction

Precise erection drawings enable smoother installation and minimise site delays.

Better Coordination

Structural steel detailing integrates seamlessly with architectural, mechanical, electrical, and plumbing models through BIM workflows.

Reduced Material Waste

Optimised detailing ensures efficient material usage and improves project profitability.

Code Compliance

Professional detailing ensures compliance with project specifications and industry standards.

Deliverables of Structural Steel Detailing Services

Professional structural steel detailing services typically include:

  • Structural shop drawings.
  • Steel fabrication drawings.
  • Steel erection drawings.
  • Connection detailing.
  • Anchor bolt plans.
  • Base plate details.
  • Assembly drawings.
  • Single-part drawings.
  • General arrangement drawings.
  • Bolt schedules.
  • Weld schedules.
  • Material take-offs.
  • Bills of Materials (BOM).
  • CNC data files.
  • NC1/DSTV files.

Industries That Benefit from Structural Steel Detailing

Structural steel detailing is widely used across multiple industries, including:

  • Commercial buildings.
  • Residential developments.
  • Industrial facilities.
  • Warehouses.
  • Manufacturing plants.
  • Airports.
  • Hospitals.
  • Educational institutions.
  • Sports stadiums.
  • Bridges.
  • Power plants.
  • Oil and gas facilities.
  • Mining projects.

Software Used for Structural Steel Detailing

Modern detailers rely on advanced software to improve precision and collaboration.

Popular platforms include:

  • Tekla Structures.
  • Autodesk Advance Steel.
  • Autodesk Revit.
  • SDS2.
  • AutoCAD.
  • Navisworks.
  • BIM 360.

These tools enable clash detection, automated drawing generation, material tracking, and BIM coordination.

Why Choose Professional Structural Steel Detailing Services?

Experienced steel detailers help projects move efficiently from design to fabrication by delivering accurate, coordinated, and fabrication-ready documentation.

A professional detailing partner can provide:

  • Experienced detailers
  • BIM-enabled workflows
  • High-quality shop drawings
  • Fast turnaround times
  • Strict quality control
  • Compliance with international standards
  • Coordination with architects, engineers, and fabricators
  • Cost-effective detailing solutions

Whether you’re constructing a commercial building, industrial plant, warehouse, or bridge, professional structural steel detailing helps reduce project risks while improving construction efficiency.

Frequently Asked Questions

Is structural steel detailing the same as steel detailing?

Not exactly. Structural steel detailing is a specialised subset of steel detailing that focuses on the primary load-bearing framework. Steel detailing is a broader term that also includes miscellaneous and architectural steel.

What drawings are included in structural steel detailing?

Typical deliverables include shop drawings, erection drawings, connection details, fabrication drawings, bolt schedules, weld schedules, Bills of Materials (BOM), and CNC files.

What is miscellaneous steel detailing?

Miscellaneous steel detailing covers secondary steel components such as stairs, ladders, railings, platforms, and other non-primary structural elements.

Which software is commonly used for structural steel detailing?

Popular software includes Tekla Structures, Autodesk Advance Steel, SDS2, Revit, AutoCAD, and Navisworks.

Why is structural steel detailing important?

Accurate detailing reduces fabrication errors, improves coordination, speeds up construction, minimises material waste, and supports successful project delivery.

Conclusion

Although the terms steel detailing and structural steel detailing are frequently used interchangeably, they represent different scopes of work. Steel detailing is the broader discipline encompassing structural, miscellaneous, and architectural steel, while structural steel detailing focuses exclusively on the load-bearing framework that forms the backbone of a structure.

Choosing an experienced structural steel detailing partner ensures accurate shop drawings, seamless BIM coordination, efficient fabrication, and successful project execution. Whether your project involves commercial buildings, industrial facilities, bridges, or complex infrastructure, investing in high-quality structural steel detailing services helps improve accuracy, reduce costs, and keep construction on schedule.

https://www.simsona.com/wp-content/uploads/2025/03/simsona-logo-2025.png 0 0 admin https://www.simsona.com/wp-content/uploads/2025/03/simsona-logo-2025.png admin2026-07-30 12:58:142026-08-14 07:09:34Steel Detailing vs Structural Steel Detailing: What’s the Difference?

Complete Guide to Cold-Formed Steel Detailing || Simsona

May 27, 2026/in Blogs/by admin
Read more
https://www.simsona.com/wp-content/uploads/2025/03/simsona-logo-2025.png 0 0 admin https://www.simsona.com/wp-content/uploads/2025/03/simsona-logo-2025.png admin2026-05-27 13:13:502026-08-14 07:09:05Complete Guide to Cold-Formed Steel Detailing || Simsona

Detailing Errors and How to Avoid Them || Simsona

April 30, 2026/in Blogs/by admin

Detailing Errors

Introduction 

In structural engineering and construction, detailing is the stage where design intent is translated into practical, buildable drawings. It bridges the gap between theoretical calculations and real-world execution. However, this stage is also highly sensitive to errors. Even small detailing mistakes can lead to serious consequences such as construction delays, increased costs, fabrication issues, or structural failures. 

Detailing errors are not always dramatic or obvious. Often, they are subtle—misplaced dimensions, incorrect clearances, or poor coordination between components. Yet, their impact can ripple across the entire project lifecycle. Understanding these errors and learning how to avoid them is essential for engineers, detailers, and project teams. 

What Are Detailing Errors? 

Detailing errors refer to inaccuracies, omissions, or inconsistencies in construction drawings and models that affect fabrication, assembly, or performance. These errors can occur in structural steel detailing, rebar detailing, MEP systems, or architectural drawings. 

They typically arise due to: 

  • Lack of coordination between disciplines. 
  • Misinterpretation of design intent. 
  • Inadequate knowledge of standards. 
  • Time pressure and human oversight. 


Common Types of Detailing Errors 

Detailing errors are among the most common causes of construction delays, cost overruns, and structural issues. In steel and rebar detailing, even minor inaccuracies can lead to serious on-site complications. Understanding the common types of detailing errors is essential for improving accuracy and ensuring smooth project execution. 


  1. Incorrect Dimensions and Measurements

One of the most frequent errors in detailing is incorrect or inconsistent dimensions. A minor mistake in measurement can result in misaligned components that do not fit together on-site. 

Example 

A beam length is detailed 10 mm shorter than required. During installation, it fails to connect properly with the column, leading to site modifications. 

How to Avoid 

  • Always cross-check dimensions with design drawings. 
  • Use standardized units consistently. 
  • Implement a double-check or peer-review system. 


  1. Inadequate Clearances and Spacing

Proper spacing is critical for installation, maintenance, and safety. Errors in clearance can make it impossible to install bolts, weld components, or place reinforcement. 

Example 

Bolts are placed too close together, leaving no room for tools during tightening. 

How to Avoid 

  • Follow code-specified minimum spacing and edge distances. 
  • Consider tool accessibility during detailing. 
  • Use 3D modeling to visualize real-world constraints. 


  1. Poor Coordination Between Disciplines

Clash and coordination errors are another critical category, especially in complex projects involving multiple disciplines. Structural elements may clash with mechanical, electrical, or plumbing (MEP) components if proper coordination is not maintained. For example, a beam passing through a duct or pipe indicates poor integration between teams. This type of error is increasingly addressed using BIM (Building Information Modeling), but it still occurs when coordination processes are weak. 

Example 

A structural beam clashes with an HVAC duct because both were designed independently. 

How to Avoid 

  • Use coordinated BIM models. 
  • Conduct regular clash detection meetings. 
  • Maintain clear communication between teams. 


  1. Overcrowded Reinforcement or Connections

Over-detailing or placing too many elements in a limited space can create practical challenges during construction. 

Example 

Rebar congestion in a column makes it difficult to pour concrete properly, leading to voids. 

How to Avoid 

  • Optimize design to reduce congestion. 
  • Maintain minimum spacing between elements. 
  • Consult site engineers for constructability feedback. 


  1. Incorrect Material Specifications

Using the wrong material grade or type can compromise structural performance. 

Example 

Specifying a lower-grade bolt in a high-load connection reduces safety. 

How to Avoid 

  • Verify material specifications against design requirements 
  • Follow relevant codes and standards 
  • Clearly label materials in drawings 


  1. Lack of Constructability Consideration

A design may look perfect on paper but fail during execution if constructability is ignored. 

Example 

A weld is specified in a location that is physically inaccessible. 

How to Avoid 

  • Think from the fabricator’s and contractor’s perspective. 
  • Ensure accessibility for welding, bolting, and installation. 
  • Conduct constructability reviews. 


  1. Missing or Incomplete Details

Drawings that lack essential details such as material specifications, bar bending schedules (BBS), or reinforcement placement instructions can halt construction work. Fabricators and contractors depend heavily on complete and precise data, and any omission can cause delays or rework. 

Example 

A connection detail is missing, leading to incorrect site fabrication. 

How to Avoid 

  • Ensure all components are fully detailed. 
  • Provide clear notes and instructions. 
  • Use checklists before finalizing drawings. 


  1. Code compliance errors

Another common problem is code compliance errors. Detailing must follow relevant standards and codes, such as those related to safety, material strength, and construction practices. Ignoring these requirements can lead to non-compliant designs, which may be rejected during inspection or cause long-term structural issues. 


Example 

Different drawings use different units or symbols for the same element. 

How to Avoid 

  • Follow standardized drafting conventions. 
  • Maintain uniformity across all drawings. 
  • Use templates and company standards. 


  1. Revisionand version control errors 

Every construction process has tolerances. Ignoring them can result in misfits and alignment issues. 

Example 

No allowance is made for fabrication tolerances, causing misalignment during assembly. 

How to Avoid 

  • Include tolerances in detailing. 
  • Coordinate with fabrication capabilities. 
  • Allow flexibility where necessary. 


  1. Poor Communication and Documentation

Errors often arise when information is not clearly communicated or documented. 

Example 

A design revision is not updated in detailing drawings, leading to outdated information on-site. 

How to Avoid 

  • Maintain version control of drawings. 
  • Clearly document revisions. 
  • Ensure all stakeholders are informed of changes. 


Impact of Detailing Errors 

Detailing errors can have far-reaching consequences: 

  • Construction Delays: Rework and corrections slow down progress. 
  • Increased Costs: Material wastage and labor costs rise. 
  • Safety Risks: Structural weaknesses can endanger lives. 
  • Reduced Quality: Final output may not meet design standards. 

In large projects, even a small detailing mistake can escalate into significant financial and operational setbacks. 


Role of Technology in Reducing Errors 

Modern tools like BIM (Building Information Modeling) have significantly reduced detailing errors. It’s not only reduce human errors but also improve collaboration, visualization, and data management. 

Benefits of BIM 

  • 3D visualization improves understanding. 
  • Clash detection identifies conflicts early. 
  • Automated checks reduce manual errors. 
  • Better coordination among disciplines. 

Software such as Tekla Structures and Revit enables precise and efficient detailing. 


Best Practices to Avoid Detailing Errors 

Understanding of design intent 

One of the most important practices is thorough understanding of design intent. Detailers must carefully study structural and architectural drawings before starting their work. Misinterpreting load paths, support conditions, or reinforcement requirements often leads to critical errors. Regular communication with design engineers helps clarify doubts early and prevents incorrect assumptions. 

Clear and consistent drawings 

Maintaining clear and consistent drawings is equally essential. All drawings—general arrangement, shop drawings, and fabrication details—should follow standardized conventions. Using consistent symbols, annotations, and dimensioning methods avoids confusion for fabricators and site teams. Clear labeling of sections, elevations, and connection details ensures that the drawings are easy to interpret. 

Codes and standards 

Another key practice is strict adherence to codes and standards. Whether working with steel or reinforced concrete, detailers must follow relevant design codes for spacing, cover, weld sizes, and bolt specifications. Ignoring these guidelines can result in unsafe or non-compliant structures. Keeping updated with the latest revisions of standards is equally important. 

Quality checks and reviews 

Implementing quality checks and reviews is one of the most effective ways to prevent errors. A structured checking process—often involving a second experienced detailer—helps identify mistakes such as incorrect dimensions, missing components, or inconsistencies. Many organizations adopt multi-level checking systems (self-check, peer review, and final approval) to ensure high accuracy. 

Coordination among disciplines 

Effective coordination among disciplines is critical, especially in complex projects. Structural, architectural, and MEP teams must work in sync to avoid clashes. Using tools like Building Information Modeling helps integrate all disciplines into a single model, allowing early detection of conflicts such as beams intersecting with ducts or pipes. Regular coordination meetings further strengthen collaboration. 

Automated detailing tools 

Using reliable and automated detailing tools also reduces the risk of human error. Software like Tekla Structures and AutoCAD improves precision and consistency in drawings. Automation features such as auto-dimensioning, template usage, and predefined libraries help eliminate repetitive mistakes and maintain uniformity. 

Proper version control and document management 

Another best practice is proper version control and document management. All stakeholders should work with the latest drawings and revisions. Cloud-based platforms ensure that updates are shared in real time, reducing the chances of outdated information being used on-site. Maintaining a clear revision history also helps track changes and accountability. 

Attention to constructability 

Attention to constructability is often overlooked but highly important. Detailers should consider how elements will be fabricated, transported, and installed. For example, overly complex connections or impractical reinforcement layouts can create difficulties during construction. Practical and buildable designs reduce the likelihood of on-site modifications and errors. 


Conclusion 

Detailing errors are an inevitable risk in construction, but they can be minimized through careful planning, coordination, and attention to detail. Understanding common mistakes—such as incorrect dimensions, poor spacing, lack of coordination, and missing details—helps professionals anticipate and prevent them. 

Avoiding these errors is not just about technical accuracy; it is about ensuring safety, efficiency, and project success. As construction projects become more complex, the importance of precise and error-free detailing continues to grow. 

Ultimately, good detailing is not just about drawing lines—it is about thinking ahead, anticipating challenges, and creating solutions that work seamlessly in the real world. 


https://www.simsona.com/wp-content/uploads/2025/03/simsona-logo-2025.png 0 0 admin https://www.simsona.com/wp-content/uploads/2025/03/simsona-logo-2025.png admin2026-04-30 12:31:082026-05-18 09:41:34Detailing Errors and How to Avoid Them || Simsona
Page 1 of 6123›»

Architectural Projects

  • BAPS Temple
  • BJ’s Warehouse Club
  • Potomac Construction Company Inc.
  • Carlisle Church Phase 1
  • Carlisle Church Phase 2
  • Central Wholesaler
  • Gainesville Commerce Center
  • Peter Pan
  • Thompson Creek Windows
  • Route 124 Center
  • Contemporary House Design, Rockville
  • Office Building in NY
  • Summerline AAA Ballpark
  • The City of Laugheed
  • McKinney Fire Station
  • 718 Clay Street
  • Edgewater Elementary School

SERVICES

  • ARCHITECTURAL BIM SERVICES
  • STRUCTURAL BIM SERVICES
  • MEP BIM SERVICES

LOCATIONS

Maryland, California, New Delhi, and Chennai

linkedin logo     facebook logo

CERTIFICATIONS

mdot_mbe_dbe_sbe_certified

Simsona Corporation

1451 ROCKVILLE PIKE, SUITE #250

ROCKVILLE, MD 20852

PHONE: 301-774-0880

EMAIL: RAJ@SIMSONA.COM

OTHER STATE CERTIFICATIONS

NEW JERSEY DBE CERTIFIED

ARIZONA DBE CERTIFIED

COLORADO DBE CERTIFIED

HAWAII DBE/SBE CERTIFIED

TEXAS DBE CERTIFIED

CALIFORNIA DBE CERIFIED

WASHINGTON STATE DBE CERTIFIED

OFFICE HOURS (EST)

MONDAY-FRIDAY: 7:00AM-7:00PM
SATURDAY: 8:00AM-4:00PM

OTHER SERVICES

CPM SCHEDULING

DESIGN SERVICES


© Copyright - Simsona Corporation - Enfold Theme by Kriesi
Scroll to top Scroll to top Scroll to top